
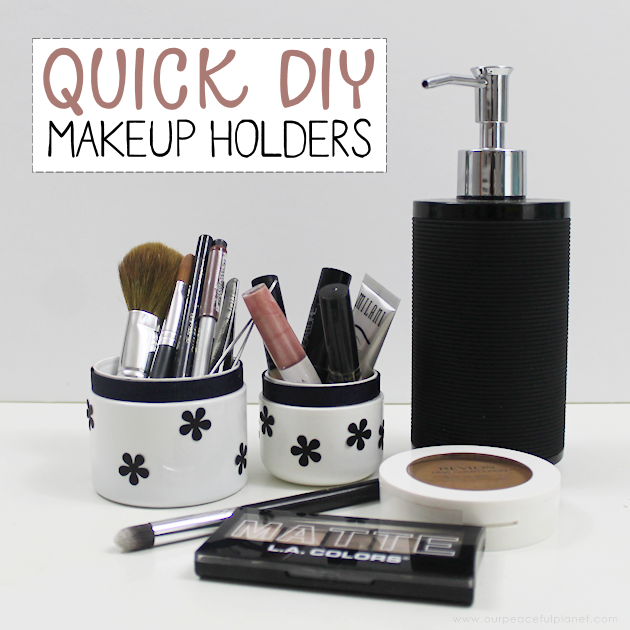
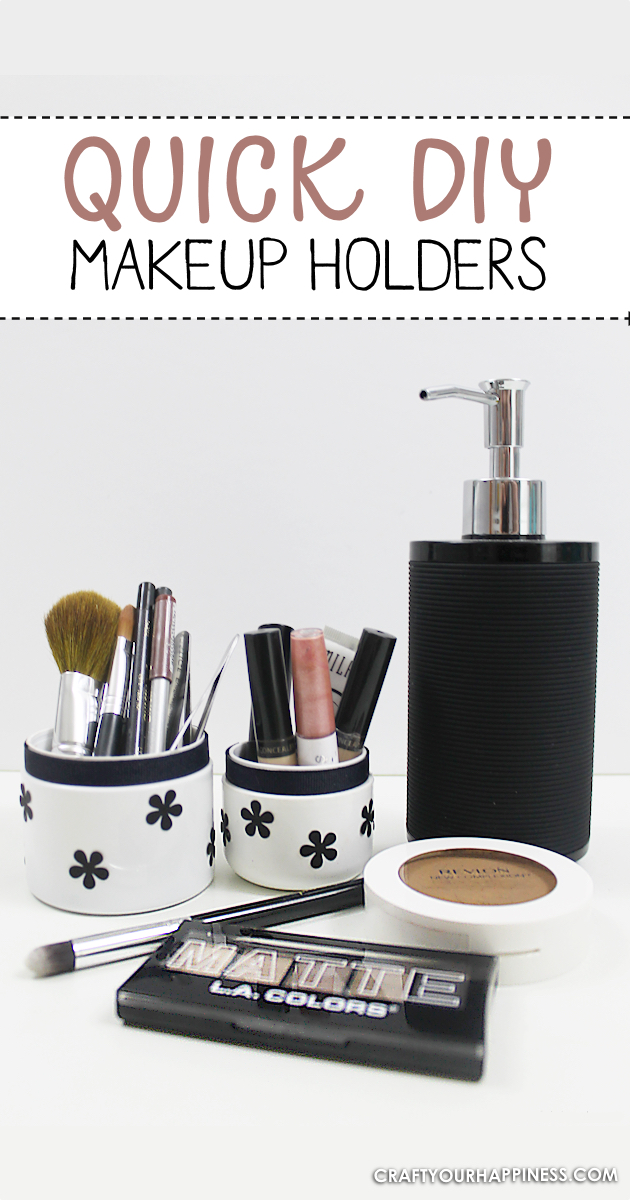
![]() This didn’t start out as a post, it started out as a personal need. I hadn’t planned on doing a DIY makeup storage post but then I thought, why not since I’m doing the project for myself anyway. I’d been redoing my master bathroom and I was at the place where I was re-organizing my makeup. I just needed some little thing to hold my longer makeup items… mascara, eyeliner, brushes, etc. I knew I could buy something but I wanted to get it finished, so I started walking through the house trying to find something that would work. There was nothing in the kitchen so I went out into the garage where I keep all my upcycle containers. Nothing there either. Everything was too tall. Then I went into my herb closet (from my herb closet makeover) … and spotted two empty salve containers I’d saved. Hmmm…. if I took the lid off one it looked about right. Of course I couldn’t just stick plain old white salve jar bottom in my nice bathroom. That would be crazy. So I had to fancy it up just a tiny bit. I ended up using both of the containers by the way. Took like 10 minutes and cost me nothing.
This didn’t start out as a post, it started out as a personal need. I hadn’t planned on doing a DIY makeup storage post but then I thought, why not since I’m doing the project for myself anyway. I’d been redoing my master bathroom and I was at the place where I was re-organizing my makeup. I just needed some little thing to hold my longer makeup items… mascara, eyeliner, brushes, etc. I knew I could buy something but I wanted to get it finished, so I started walking through the house trying to find something that would work. There was nothing in the kitchen so I went out into the garage where I keep all my upcycle containers. Nothing there either. Everything was too tall. Then I went into my herb closet (from my herb closet makeover) … and spotted two empty salve containers I’d saved. Hmmm…. if I took the lid off one it looked about right. Of course I couldn’t just stick plain old white salve jar bottom in my nice bathroom. That would be crazy. So I had to fancy it up just a tiny bit. I ended up using both of the containers by the way. Took like 10 minutes and cost me nothing.
We also did a full makeover on our master bathroom that we used this containers in, complete with recovering the counter with contact paper.
Make sure you check that out too>>>>>> Magical Dark Sea Bathroom Makeover
Makeup Storage Supplies
- Any Container
- Paint if Needed
- Ribbon
- Flower punch
- Glue (Tacky Glue Pen)
 Visuals
I had my makeup crammed into this silver box and I was moving it over to a small open door chest. However, to make the most of the room I needed to stand my longer items up in something.
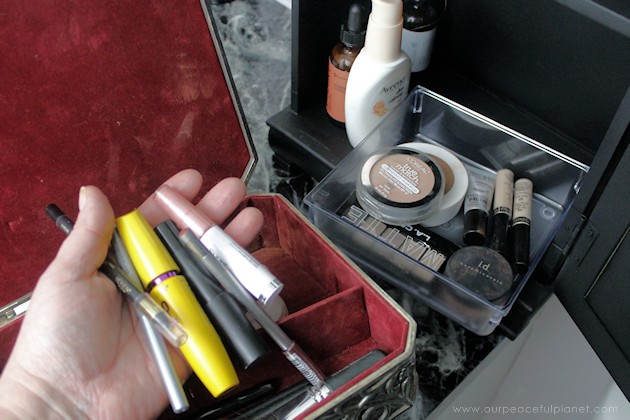
I went on a hunt throughout my house but nothing I found worked quite right. Most things were too tall.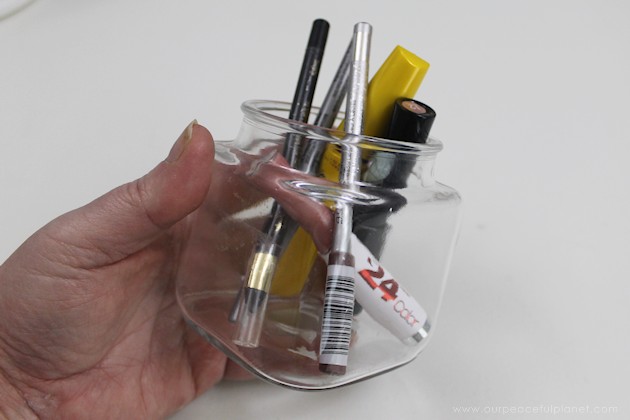
Then I came across a couple of empty salve containers. 
Perfect! But it needed a little dressing up. 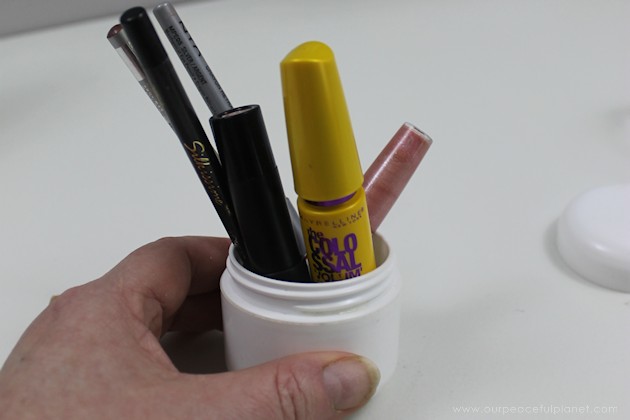
I took some black ribbon and cut it to fit around the top.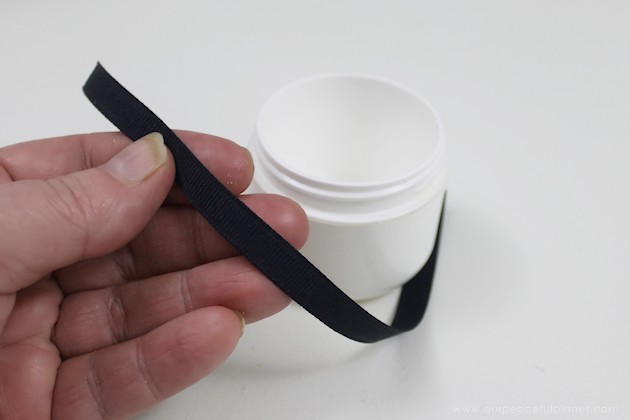
Hot glued it on.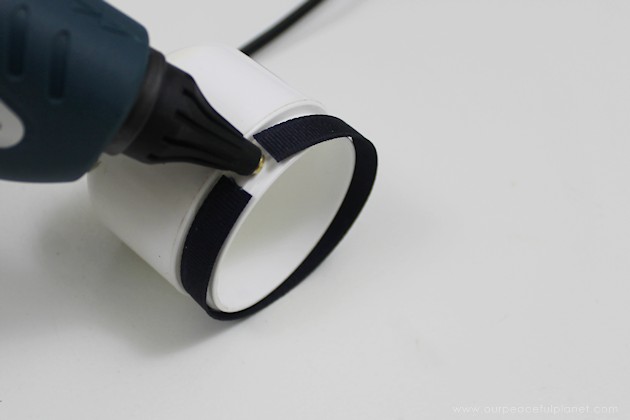
I had a nice little flower punch that I liked and punched out a few black flowers. 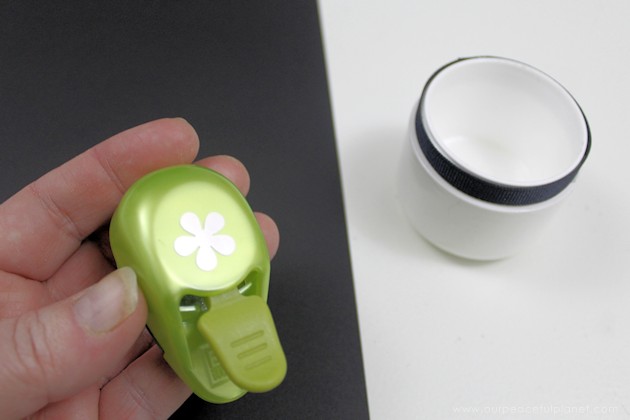
I grabbed my Aleene’s Tacky Glue pen which was perfect for this job. 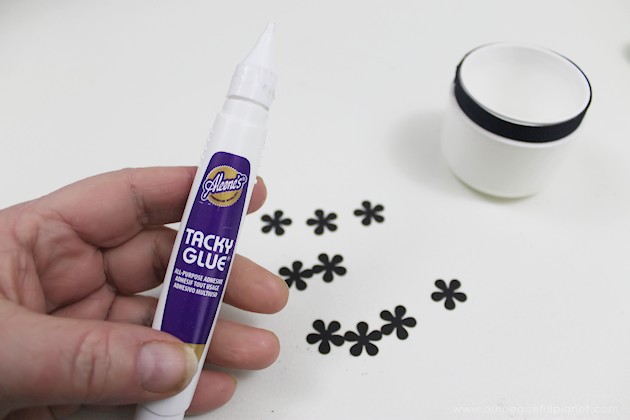
I placed a dot on the center of each flower. 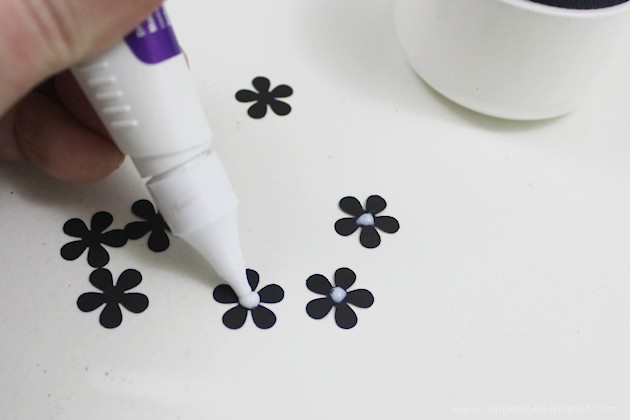
Then I stuck them on. I wanted the petals to stick out. If you don’t, I’d suggest using spray adhesive on the back of them for a good stick. 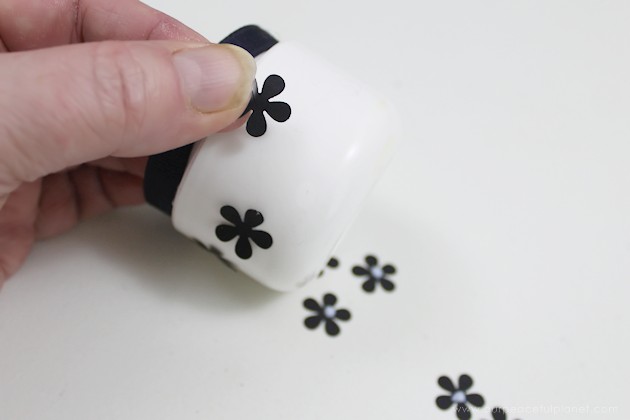
![]()
![]()
Pingback: Quick Cardboard Pull Out Cabinet Organizer