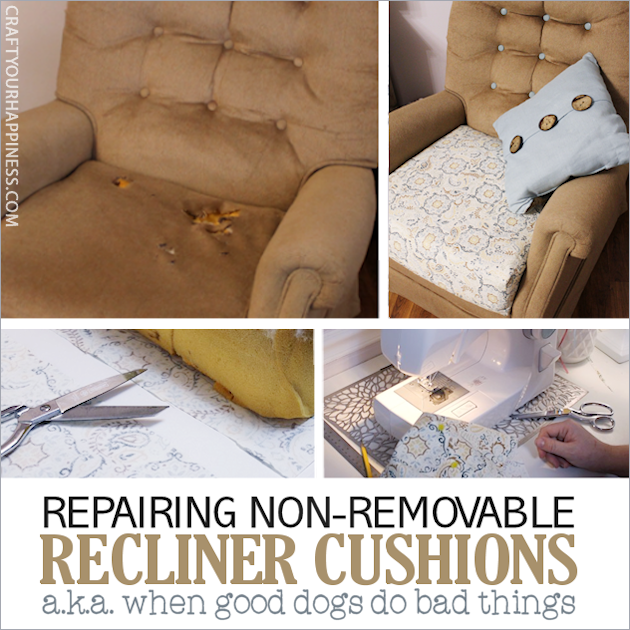
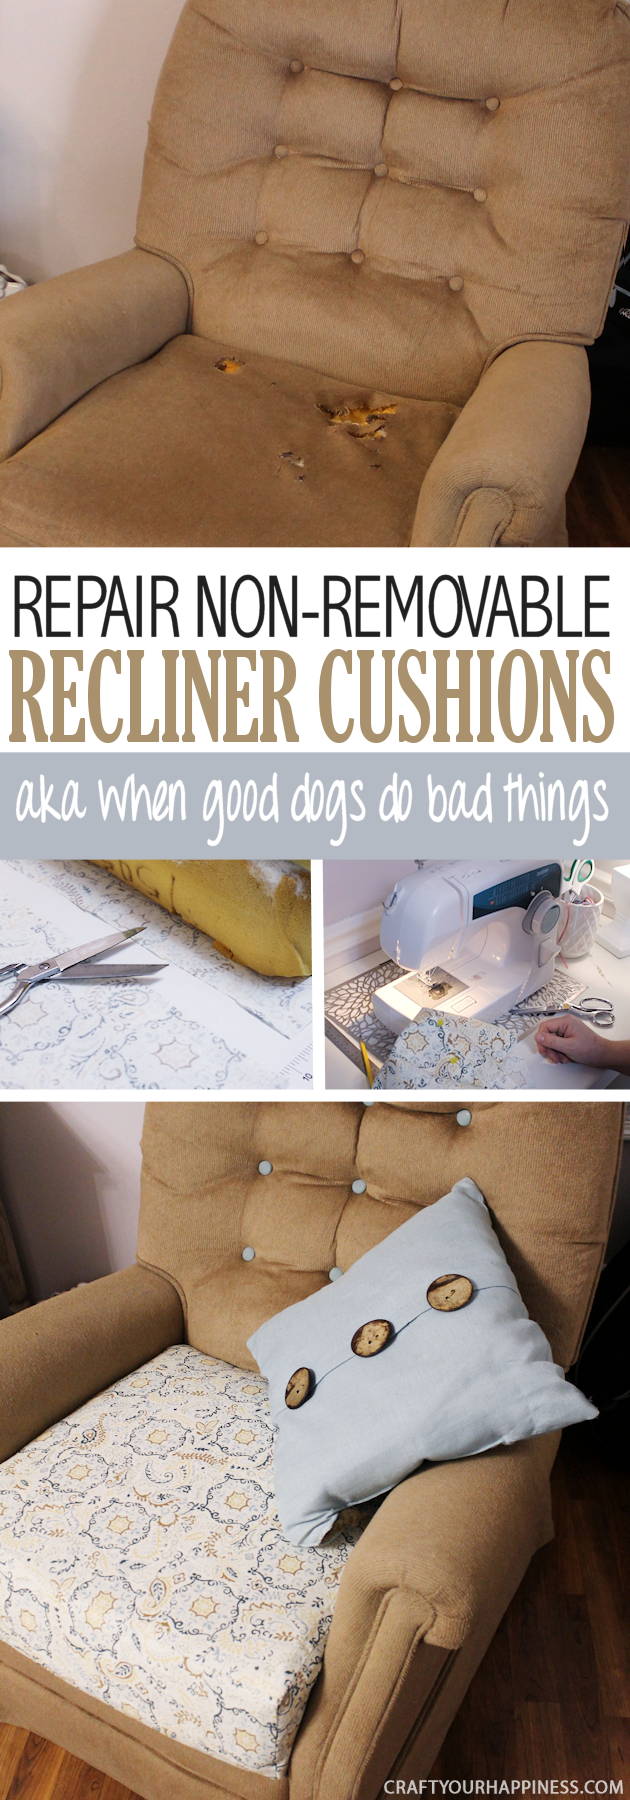
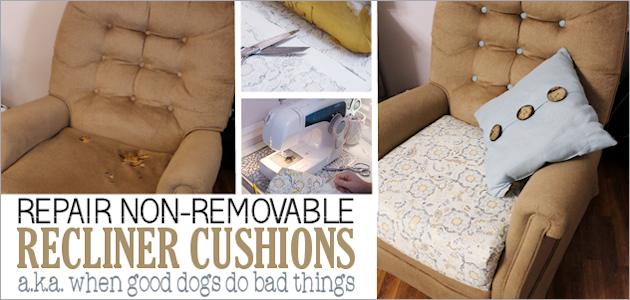
Have you ever wondered how to repair a recliner cushion? Our doggie, Oliver Sprout, for reason unknown to us, started digging on this recliner cushion. (This is him below. I know… it doesn’t seem like he’d do such a thing, yet here we are.)
It’s the only one he touched and he’s not bothered a single other piece of furniture. This was a second hand piece of furniture and can happen if whomever owned it before had pets. Your dog will smell that and it can cause them to do this. Anyway… you can see the damage he did. I was concerned because recliner cushions are not easy to cover as they are mounted in. However, my “can do” daughter Jennifer decided to take on the project. It was a little work but still very doable. Though your recliner will no doubt be different, you can view our step by step photos below to see how she recovered ours and even added some fun covered buttons. FYI Oliver has not touched it since. Go figure.
If you’d like to see some other fun furniture updates and makeovers we’ve done check out the DIY Bench Seat we made from $2 thrift store chairs and our Cheap Folding Stool Makeover. Many other creative ideas abound so snoop around the site once you’re done here!![]()
Supplies
- 2 yards of fabric – preferably a heavy, durable fabric intended for furniture
- Fabric for buttons, contrast if desired (optional)
- Foam – for patching holes or adding thickness to cushion
- Sewing Machine
- Needle & thread
- Fabric Scissors
- Measuring tape
- Sharpie or fabric pencil
- Buttons or a craft cover button kit
- Febreze Heavy Duty Fabric Freshener (optional)
 Instructions
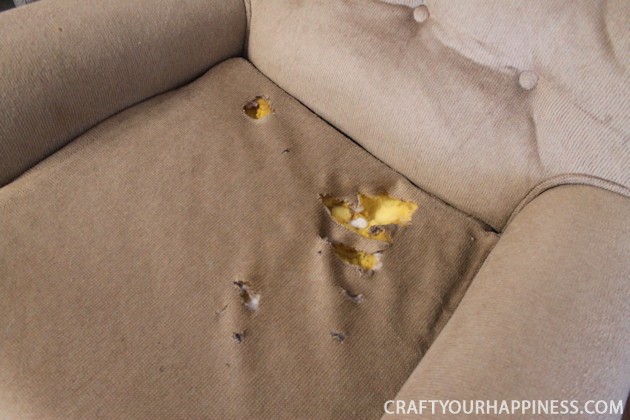
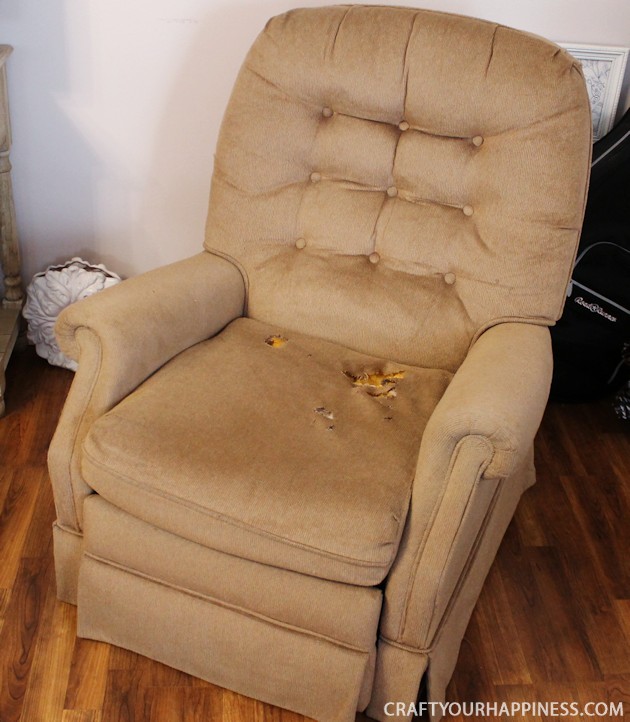
Our beloved pup, Oliver Sprout, decided that our favorite recliner would be a good spot to go on a scavenger hunt. After weeks of digging, a little at a time, we were left with holes and tears in the seat cushion. Not wanting to toss the comfy seating, we opted for a simple repair job.
Read on to see how we patched up our damaged recliner in just over an hour.
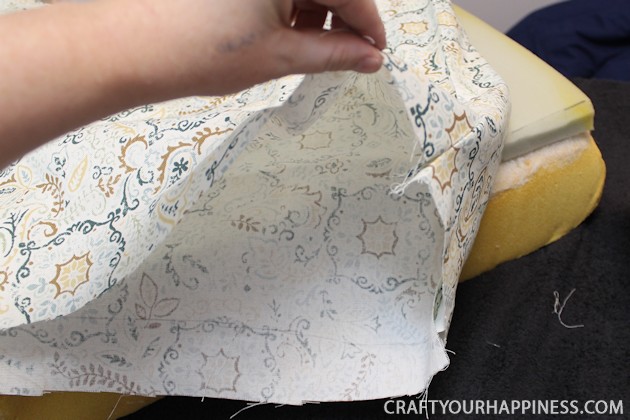
We began by removing the seat cushion from the recliner. This specific cushion was actually attached to the chair, so we had to lift the edges and cut the fabric to remove it. Be sure to cut as close to the seam as possible so that the cut lines are hidden when the cushion is placed back onto the chair. Once the cushion is removed, slide off the fabric that was covering it, leaving you with just the foam and matting of the cushion.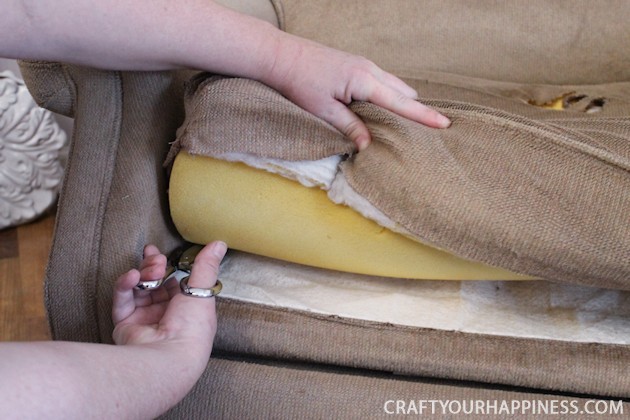
We decided to freshen up the cushion with a little Febreeze prior to fixing it. We love our little Oliver, but he digs in more things than just cushions and they don’t always smell the best.

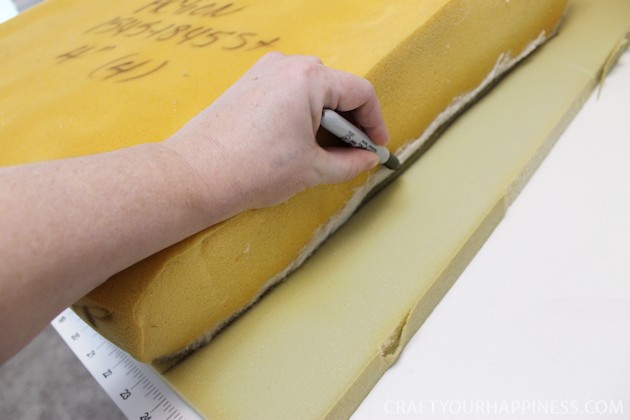
After years of use, the holes in the cushion weren’t our only concern. We wanted to add a little more padding as well. For this we used a 1″ sheet of foam. Simply set the foam cushion on top of the foam sheet and outline it with a sharpie.
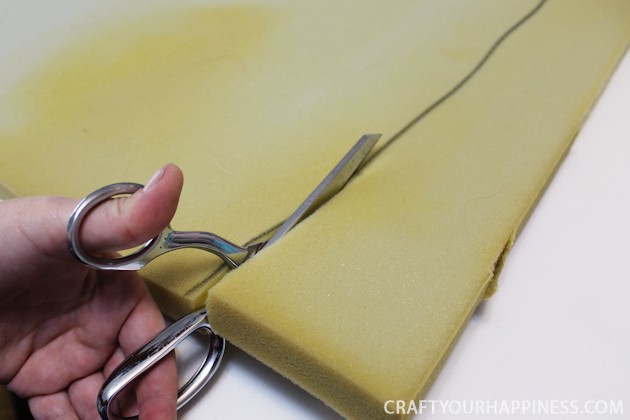
Cut the foam along your sharpie line to create your new cushion topper.
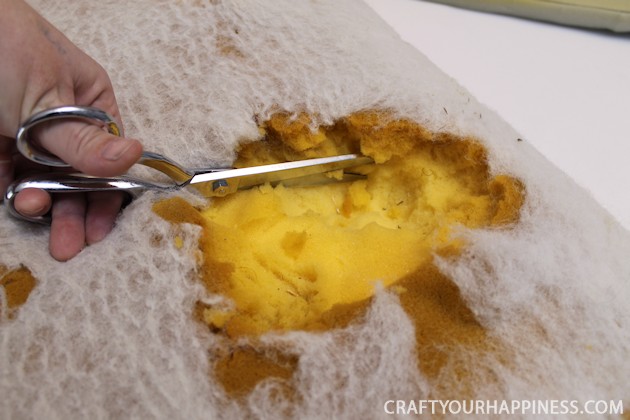
Because we wanted to fill the holes, we wanted to make the most of the 1″ foam we bought. Using our scissors we cut away the sections of the foam that were damaged, leaving a 1″ deep pocket.
We then cut pieces of the 1″ foam to fit inside the pockets we had cut.
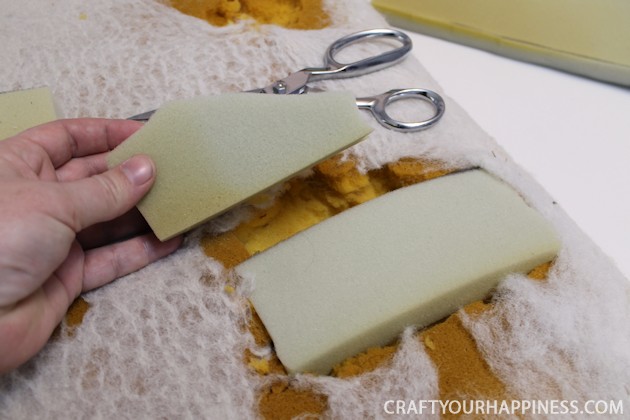
You can use a little fabric glue to help hold these in place if you like. Because we were covering this with an additional 1″ foam sheet, we just made sure that they were a nice snug fit.
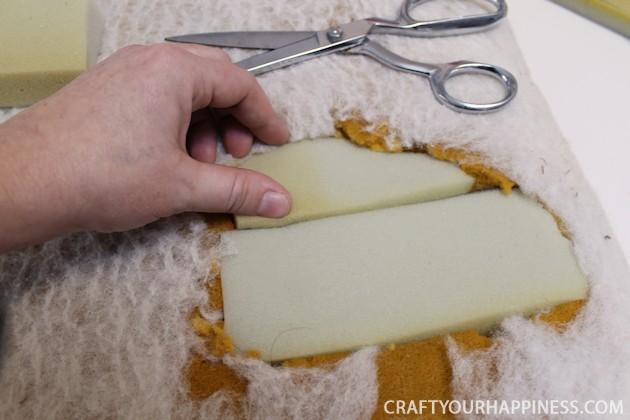
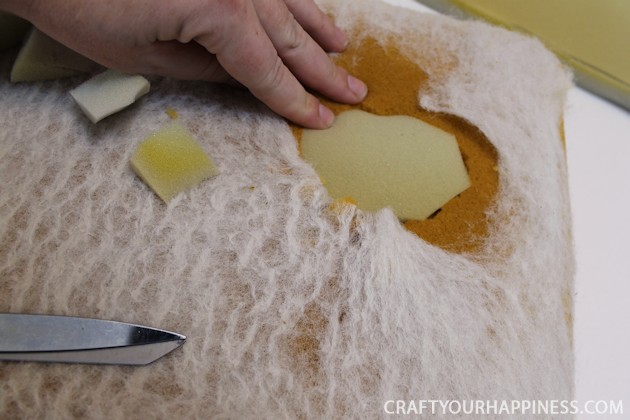
We worked our way around the cushion, cutting out and filling each hole our little Oliver had left us.
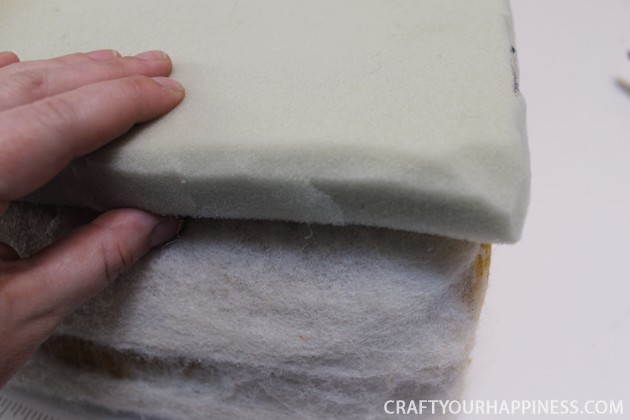
Once complete, we laid our pre-cut 1″ foam sheet over the top.
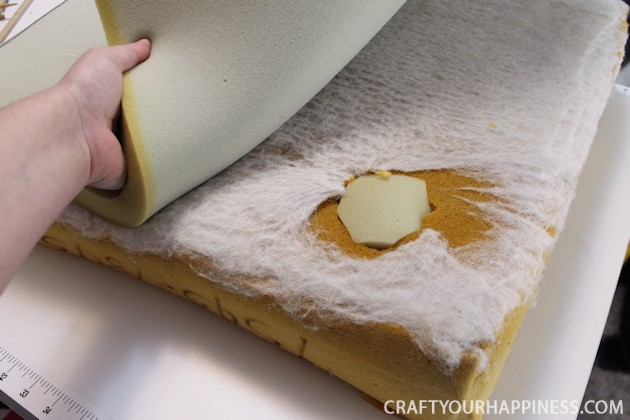
Once the foam is in place, shape the edged of the new cushion top by cutting at an angle along corners and edges.

This creates a rounded top that will look more natural under your new cover.
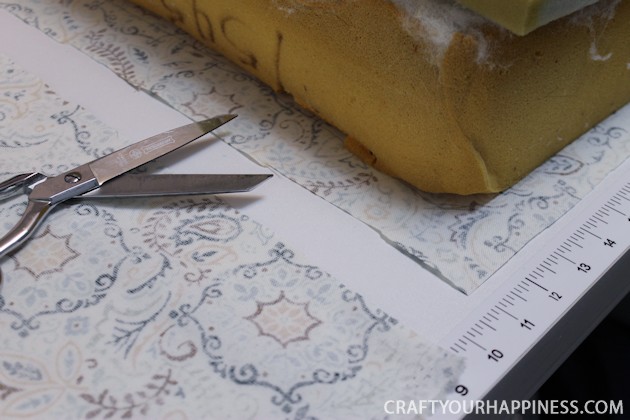
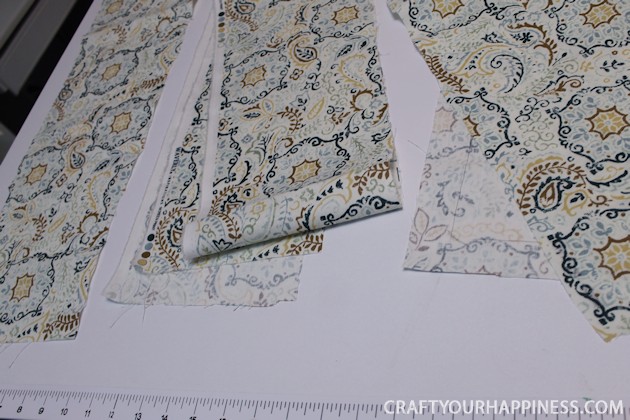
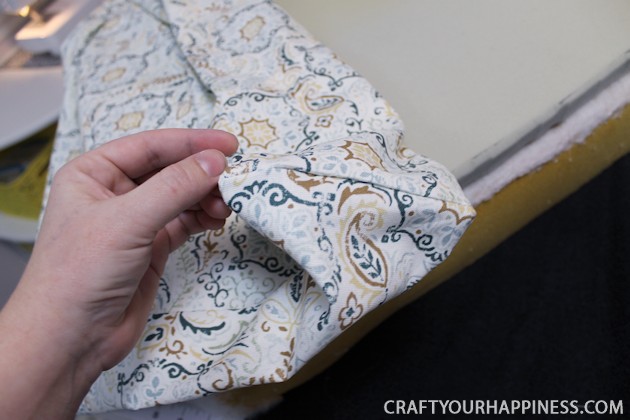
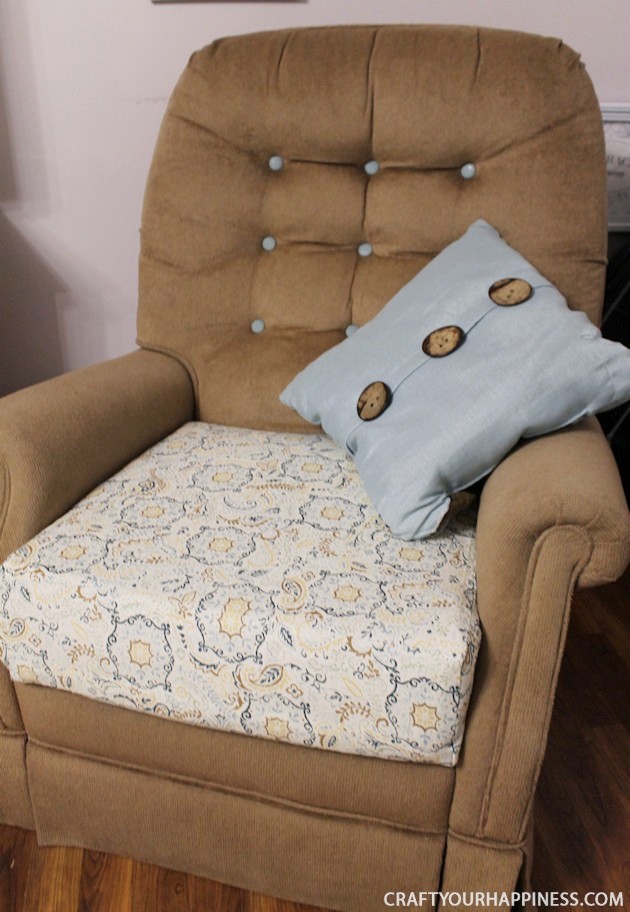
For the cover, we wrapped our 2 yards of fabric around the cushion from front to back.

We then cut the fabric to frame the cushion by about an inch.
Now we needed to cut the fabric for the sides of the cushion in order to give it a box shape.
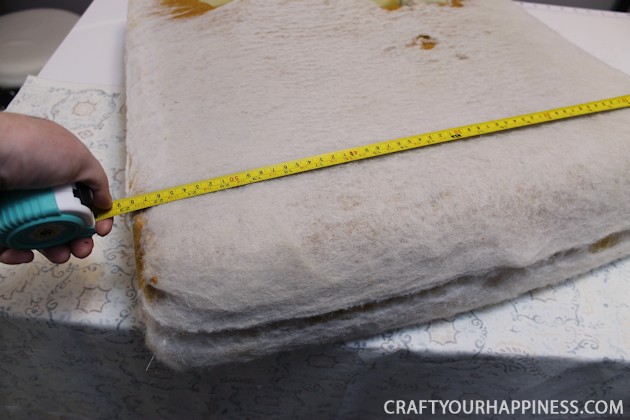
We measured the width (21″) and the length (22″) of the cushion for this. *ignore the 64″ written in the middle!
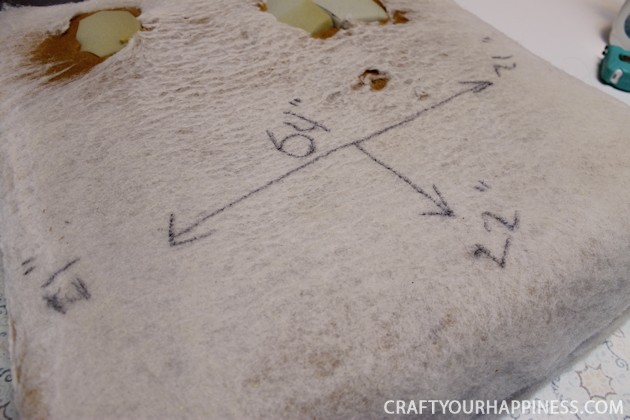
Then we measured the height of the cushion (4.5″).
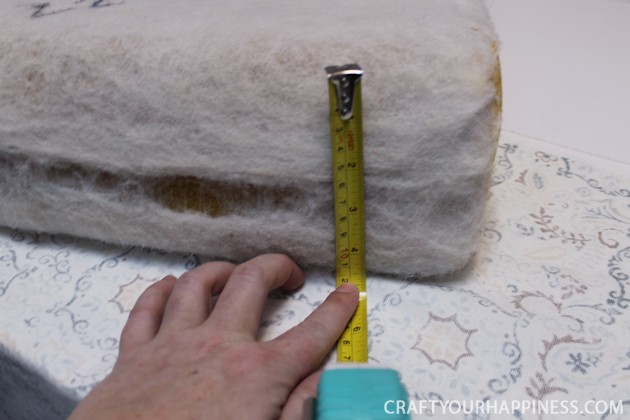
We then added 2″ to each of those measurements (for stitching space) and cut our 4 sides out of the fabric.
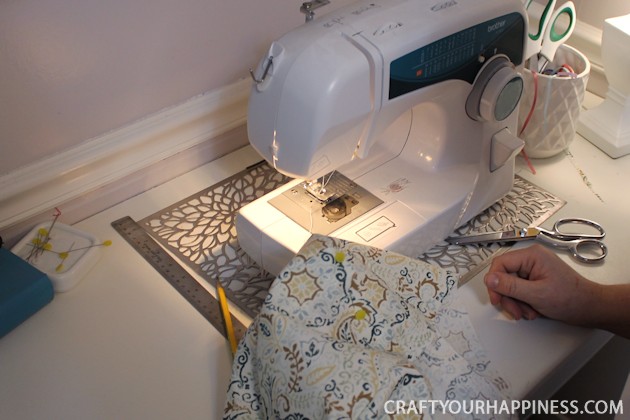
Using the sewing machine, we began stitching the cushion cover together. Facing the fabric pieces towards one another, we created our box shape. This was a bit of trial and error for us as we had never done a cushion cover before. We recommend testing the fit on the cushion after each line of stitching to ensure a good fit.
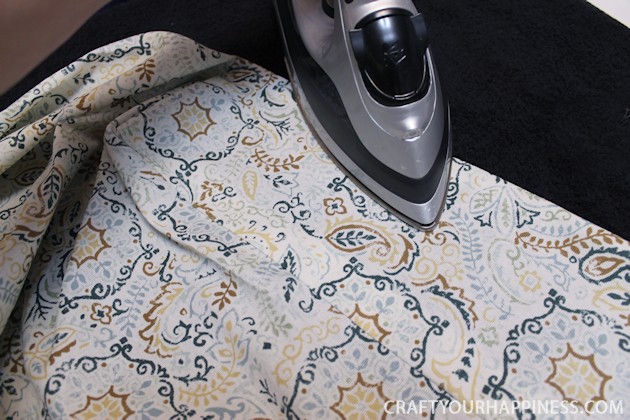
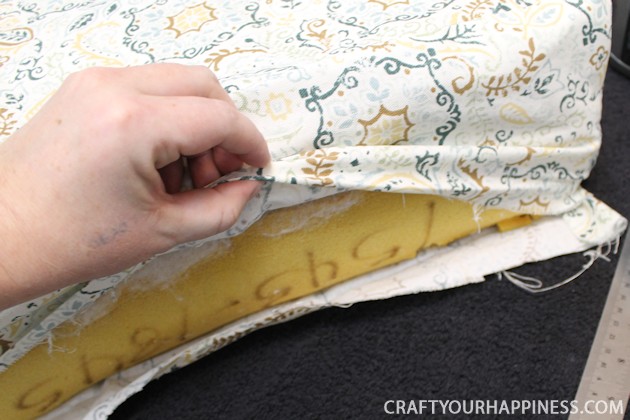
Once the cover was complete, we cut away the excess material inside the seams and ironed our seams for clean, crisp corners.
Leaving one end of the cover open, we slipped our new cover over the cushion.
We had a few corners that needed a little extra ironing. In this image you can see the corner on the left is bunched in and the corner on the right has been pulled and ironed. This makes a big difference in your finished product.
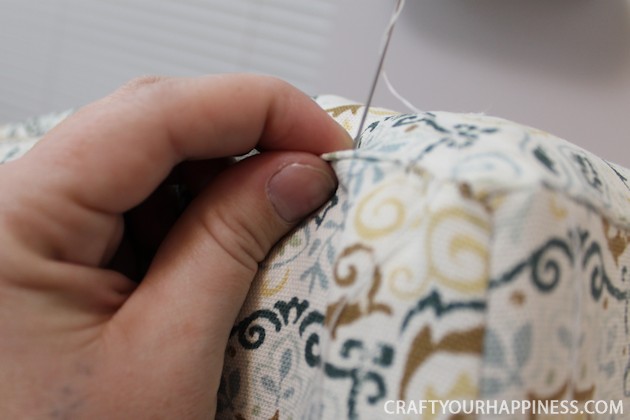
Once the fitting was complete and we were happy with our edges, we had to close the final seam around the cushion. Now, there is probably a way to do this with a sewing machine, but we opted for hand stitching.
Using a needle and thread, we folded in the edges and stitched our final seam to enclose the cushion.
Because we wanted a little extra pop of color, we chose to use a craft cover button kit to redo the buttons on the recliner to match the new cushion. This is optional. In the end, we got our favorite recliner back, added a little color to the living room, and gave Oliver a new resting place that he has kindly decided to use solely for sleeping. There are a million possibilities with this type of makeover, so don’t forget to send us pictures of yours!!
FYI: We did not attached it again to the chair. We just wrapped it in a new cover and set it back in. Though you could hold it in place with some velcro if desired, but it didn’t need it. We did this just in case we wanted it to be able to be easily recover it in the future if our pup tore it up again.


13 responses
Same with my recliner. Our rescued dogs had made mess. The foam was the iinticer ,so used a throw pillow. With batting instead, since the coonhounds often in the guest bedroom where the recliner i
Love the idea of saving an old favorite chair or even couch by repairing the damaged cushions. With 4 fur babies myself, I’m saving this for the future. Thanks for sharing! Will definitely attempt myself once I get the hang of sewing lol. So many color combinations already going through my head.
I just subscribed, I have a question. Will this work on a pleather sectional?
Did you re-attach the cushion?
Hi Caro!
We did not attached it. We just wrapped it in a new cover and set it back in there – though you could hold it in place with some velcro if desired, but it didn’t need it. Just in case we wanted it to be able to be easily recover it in the future if our pup tore it up again. I’ll be adding this info into the post. Ü
Thanks for visiting!
Nancy Ü
Using velcro is a good idea. The seat cushion on a reclining loveseat needs repair and I was concerned it might move around. Thanks for the quick response. Be well.
Great idea for keeping a good chair functional, spiffy-looking and out of a landfill. My dog digs in furniture when he suspects a MOUSE or some such creature has found a hiding place inside. It happens in the country, no matter how free of crumbs I try to keep the furniture LOL
lol! Thanks Claire!
Time and use can break down and compress the foam that makes your special seat so comfy. While most people tend to trash a recliner when it starts to show signs of wear, that’s a waste of money and of a good chair.
I read your instructions and I like your new cushion on the recliner. I never knew you could get an attached cushion away from the recliner!
Thank you for this and heavy strong fabric, too.
This is such a great idea, I found your post very smart, keep writing, Loved your blog
Thank u for this share, I have an old recliner who’s seating is worn , I am definitely going to try…
Good luck!