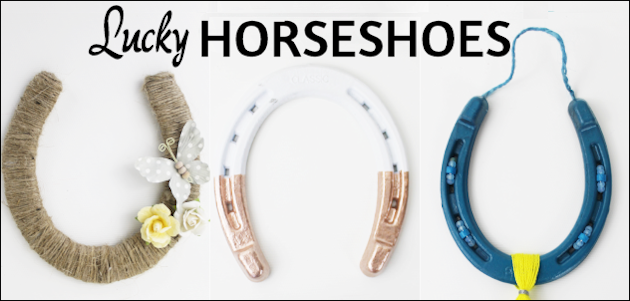

![]() Start the New Year by inviting good luck into your home with a lucky horseshoe beautifully decorated. If you can get your hands on a real horseshoe that’s great. If not we’ve got a pattern to make one out of foam board. Either way it makes a wonderful decor item with positive energy included! We’ve decorated several types to show you the wide variety of ways you can make them. There is a variety of opinions on which way to hang the horseshoe. Someone shared this story with me:
Start the New Year by inviting good luck into your home with a lucky horseshoe beautifully decorated. If you can get your hands on a real horseshoe that’s great. If not we’ve got a pattern to make one out of foam board. Either way it makes a wonderful decor item with positive energy included! We’ve decorated several types to show you the wide variety of ways you can make them. There is a variety of opinions on which way to hang the horseshoe. Someone shared this story with me:
“As far back as I can remember being told (3 generations, then a few more back where that was just passed on vs me actually hearing it.) A horseshoe is only lucky if the luck hasn’t been “drained”. Basically that you should always hang a horseshoe so that the toe is down, and the open end is facing up. Imagine the horseshoe as if it were a cup- it can only ‘catch’ & ‘hold’ that luck for you if its rightside up. If the cup (or horseshoe) is upside down sitting on the rim, everything that was in it will have spilled out, and nothing else will collect within that little “well” of luck.”
For more ideas on positive decor check out our Wood Slice DIY Room Decor: Inspiring Words and our Motivational Words Printables with DIY Stand.
Lucky Horseshoe Supplies
- A horseshoe OR foam board to make one
- Pattern below for foam board horseshoe
- Craft knife (for foam board)
- Hot glue gun
- Brown craft string (or whatever you wish to wrap your foam horseshoe)
- Paint
- Other items to decorate your horseshoe with. Ribbon, buttons, wire, beads, artificial flowers, gems, paint, etc.
 Download
Pattern for foam board (pdf)

Instructions
Foam horseshoes are perfect for wrapping with string, yarn etc.

![]()
To make foam horseshoes trace our pattern onto foam board and cut it out. Lightly sand edges if needed to help remove rough paper sticking out. 
![]()
You can wrap your foam horseshoe with a variety of things. We found this type of twine is the easiest to work with. The rounded ends of the horseshoe must be covered with small pieces before wrapping. Keep your twine close together. We used hot glue to hold the twine at the ends. Decorate as desired!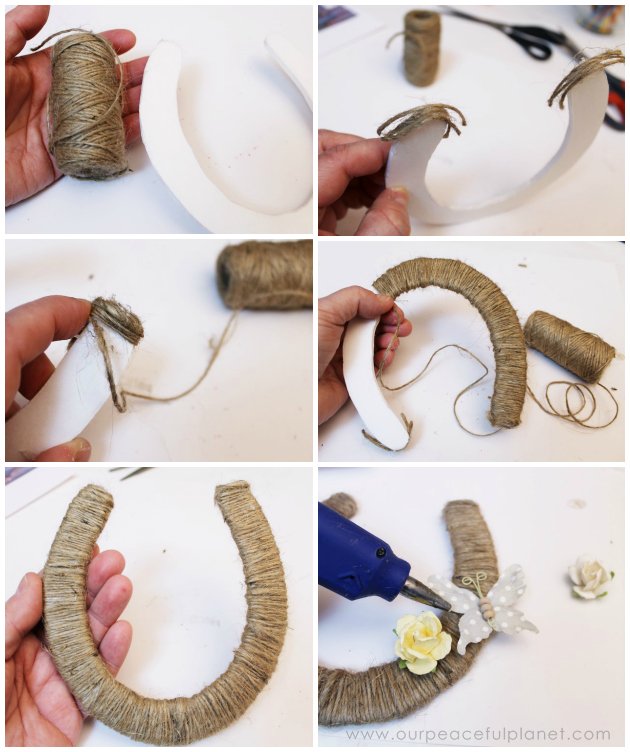
![]()
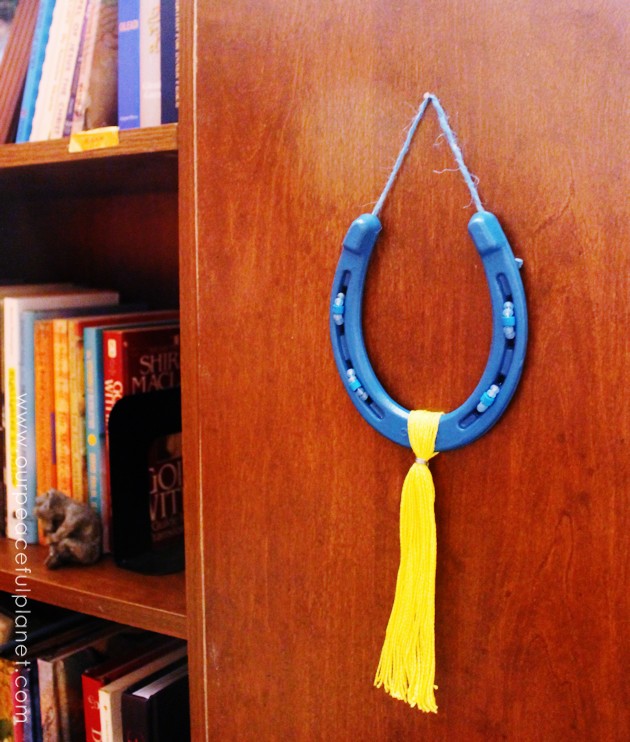
For one of our metal horseshoes we painted it with chalkboard paint and then used a chalk marker to decorate it. For our gold dipped horseshoe we used gold nail polish. Our teal horseshoe was spray painted and we used embroidery thread to make a tassel and some wire and beads to adorn it. A few more ideas can be seen below!
![]()

![]()

![]()

![]()

![]()

![]()

![]()
![]()

![]()

![]()

![]()

![]()

