![]()
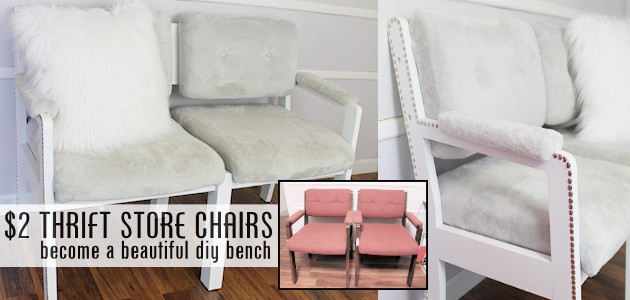
I had a spot in my office that was perfect for a bench seat. Have you ever priced those? $300 and up! I was hoping I might find one at a thrift store that I could makeover but no such luck. I did, however, happen upon these two chairs. They were on clearance for $2.00 each and as I looked at them I thought ‘those look kinda like a bench… if you take out the middle arms’. And so an idea was born and two old office chairs found a new home. It ends up recovering the cushions was easy! The total cost for the supplies? $16. I told Roy I just saved him $285 so I should be able to use that money for something else. He wasn’t buying it. If you’re a fan of thrift store finds and redo, you’ll probably also enjoy our Ceiling Fan to Thrift Store Chandelier Makeover, Refurbishing Furniture with Modern Colors and How to Turn a Working Console TV into a Piece of Art!
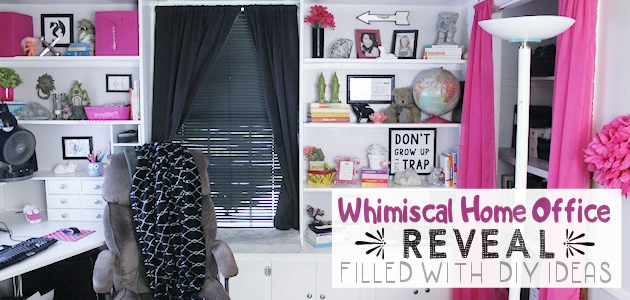
Make sure to also check out the Final Reveal Of My Whimsical Home Office Ideas! Bet you’ve never seen an office like this!
Bench Seat Supplies
- Staple Gun (we used this exact one)
- X-Acto Knife
- Silver Thumb Tacks
- Material to Cover Chairs
- Paint
- Jig Saw
- Sander or Sand Paper
- Drill
- Two nuts and bolts
- Button cover kit
- Needle nose pliers
- Hammer
 Instructions
These are the chairs as we got them from the thrift store. $2 each.

The first thing Roy did was cut the middle arm sections off on both chairs.
Marking them with tape made it easier to make the cut.
He also had to remove the back wood braces which he’s already done here.
He sanded off the area he cut.
This shows him screwing the bottom center legs of both chairs together. 
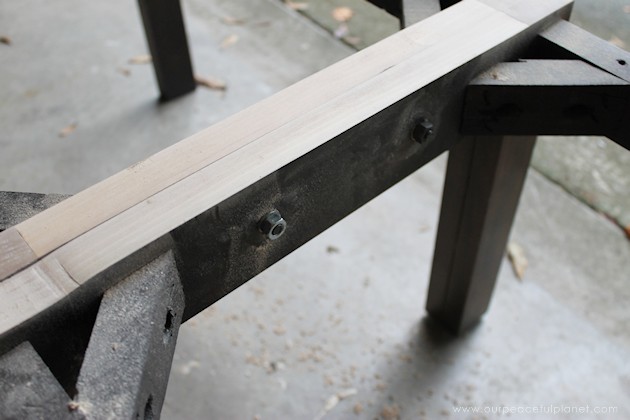
He then drilled a hole in the center braces and added two bolts for extra stability. 
A solid piece of wood was added to the back and screwed in on the sides where the original back braces were screwed in. 
It was now time to recover the cushions and arm rests. We picked a very soft, polyester “Heavenly Plush” fabric from Walmart. We also picked up a Cover Button kit to create matching buttons for the tufted back. We placed the back-cushions face down onto the backside of the fabric and cut a large enough piece to wrap around the entire cushion.
 Since we wanted to keep the tufting on the back cushions, we removed the back piece of fabric from the cushion.
 This allowed us to cut the strings from the existing tufts and remove the buttons.
 Once the back strings were cut, the buttons pulled easily out through the front.
 This is when we began wrapping the fabric and stapling it snug onto the wood frame. We left the opening we had cut so that we could re-tuft the cushion.
 Once the back cushions were wrapped, we set them aside to create our buttons.
 Using the Cover Button kit, we cut a small circle of our fabric and inserted it into the clear rubber mold.
 Then we placed the button portion, face down, onto our fabric.
 Then we fold in the edges of the fabric, completely covering the button.
 Due to the fluffiness of our fabric, we had to trim away a little excess.
 Lastly, we placed the button back on top of the folded-in fabric.
 To create the button, we simply press down over our final piece using the pusher included with the kit.
 You will feel a slight ‘pop’ when the button back inserts into the button.
 At this point, remove the pusher and pull the button out of the mold.
 Voila! Matching buttons for our tufted cushions!
 Using permanent marker, we placed dots on the back of the cushion to mark where our tufts would be.
 Instead of using standard sewing thread, we opted for a thick waxy thread that could really handle a lot of pressure.
 We began by threading down through the back of the cushion at our designated marks.
 While pushing the needle from the back, we compressed the front of the cushion to help guide the needle through.
 Once the needle was through, we threaded the button onto the back and pushed the needle back down through the cushion about 1/4 inch away from the hole we came out through.
 Once the needle is out the back, we threaded on an old button. This gave us a solid base for leverage, so we could pull the string tight and create the tuft.
 Once complete, the back looks like so.
 And the front now has our two tufts with matching buttons.
 We removed the arm rests and stapled fabric around each one, making sure to cut away any excess material so that they would easily rest back onto the arms of the chair.
 For the seat cushions, we wrapped and stapled them the same way we did with our back cushions. The one difference was that we removed the seat tufting and did not replace it as we did not want tufted seats.
 Once complete, we had beautiful, soft & smooth seat cushions that were ready to be reattached to our chair.
 Prior to replacing the cushions and arm rests, we painted the frame white.
 Once dry, we screwed on the cushions and arm rests.
 For a little added touch of style, we used a box of silver thumbtacks to create a border around the two sides of the bench. By holding the tacks with needle nose pliers and hammering them in, you get the same look as the expensive upholstery nails without breaking the bank.
 The silver border turned out absolutely amazing!
 Now we have a beautiful statement piece as well as soft and comfy seating!


11 responses
I wonder if this could be done on medal office chairs? I have 21 green very ugly medal chairs. Could you give me a suggestion please? Thanks
Hi Vonett!
I think you can do anything you want if you want too bad enough. Ü If they are the foldup type that would be tricky. But if they are solid straight heavy office chairs I would think it was possible. They just need to be able to snug up to each other like this type of chair: https://jawoodworking.com/wp-content/uploads/2015/05/TC1a.jpg I’m not sure what would be required as it would depend on the type but I would think it could be done! Metal would be tricker to work with but there has to be a way to do it. Just not sure how. I’m kind of a ‘figure it out as you go’ person when it comes to some things.
Good luck!
Nancy Ü
Thank you for the detailed written and step-by-step picture instructions. It makes projects like these doable for everyone!
Your bench turned out amazing!
Thank you Patty. So glad you liked it!
Too much work!!
Hi Nancy,
This PIN showed up in a an email from Pintrest today, as a PIN that I could add to my Rose Gold and White Office board that I created on yesterday for my daughter’s upcoming office project that we are going to work on next month. It reminded me that I had bought at least 2 sets of office chairs from yard sales/Resale store over the past two years. You’ve motivated me to do something different with these , so that I can place a bench in both her and my home offices. Love It!!!! Keep the ideas coming.
Thanks so much for letting me know that Jackie! I’m always thrilled to inspire. Thanks so much for visiting. Ü
Wow this is such a cool project!! It came out SO good & now it’s a one of a kind piece.. love it!!
XO, Katie | http://www.meshkomoments.com
Thank you Katie!
[…] Elegant DIY Clay Pot Sugar Dispenser Gold & Teal DIY Gumball Machine For Candy etc… $2 Thrift Store Chairs to Gorgeous DIY Bench Seat .yuzo_related_post img{width:204px !important; height:96px !important;} .yuzo_related_post […]
Lovely makeover and perfect timing.
I have a set of 4 gorgeous Remy Mackintosh chair backs,
some idiot threw out the seats and front legs when I was moving
house 5 years ago. I’ve hung on to them believing they could still
be used. I recently saw a picture of 2 chairs converted to a bench seat
with no instructions.
Thanks to you and Roy I now know how to convert my lovely chair backs
and get a unique piece of furniture.