
![]()
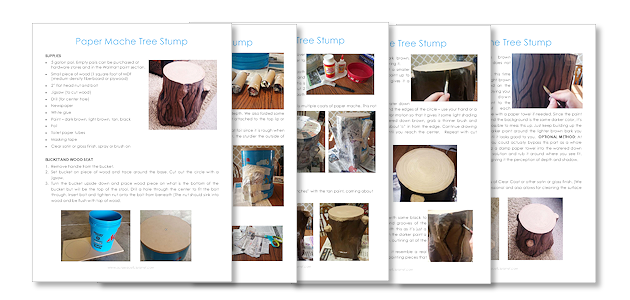
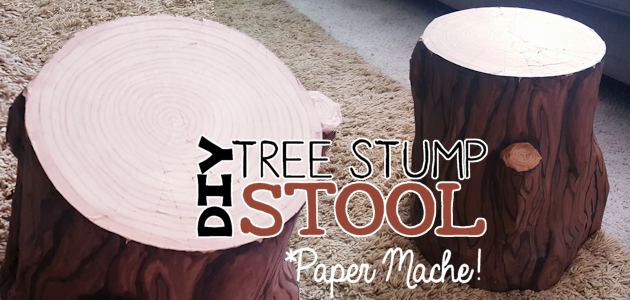
 Add some whimsy to your home with this DIY tree stump stool. Do you remember using paper mache in grammar school? (We put it over balloons we had blown up.) Well, that’s what creates the stump effect. It takes a little time but overall it’s easy to do and it’s one of those things that looks wonderful but you don’t need to be incredibly artistic to create. As always we’ve got some detailed photos and printable instructions to help you. This is another unique project created by our daughter Jennifer.
![]()
![]()
Tree Stump Stool Supplies
- 5 gallon pail Empty pails can be purchased at hardware stores and in the Walmart paint section.
- Small piece of wood (1 square foot of MDF (medium-density fiberboard or plywood)
- 2” flat head nut and bolt
- Jigsaw (to cut wood)
- Drill (for center hole)
- Newspaper
- White glue
- Paint – dark brown, light brown, tan, black
- Foil
- Toilet paper tubes
- Masking tape
- Clear satin or gloss finish, spray or brush on
Download Instructions
Tree Stump Stool Instructions (pdf)
 [sdm_download id="21508" fancy="0"]
Instructions
Remove handle from the bucket. Set bucket on piece of wood and trace around the base. Cut out the circle with a jigsaw.

Turn the bucket upside down and place wood piece on what is the bottom of the bucket but will be the top of the stool. Drill a hole through the center to fit the bolt through. Insert bolt and tighten nut onto the bolt from beneath (The nut should sink into wood and be flush with top of wood.

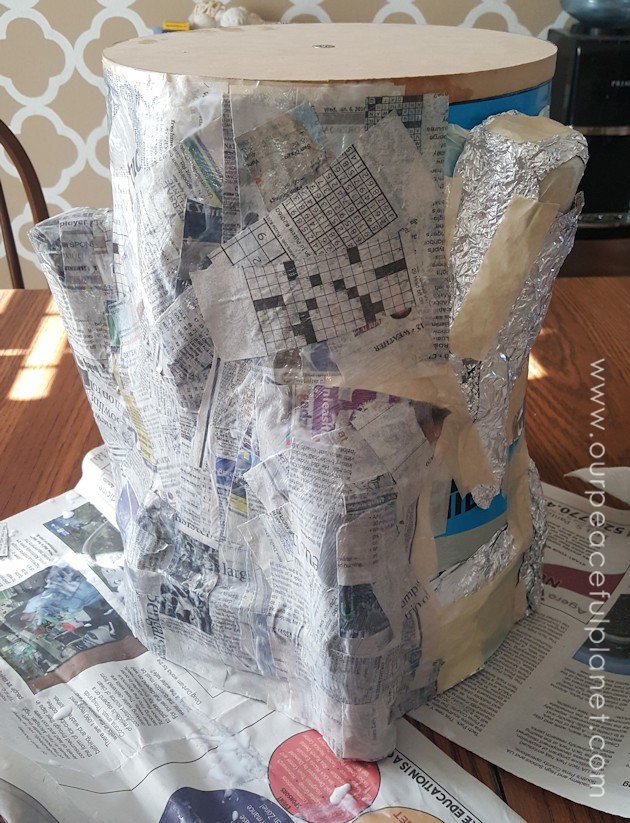
Gather toilet paper rolls and stuff them with newspaper – We used eight.

Choose where you want your branches and thick roots and use masking tape to apply toilet paper tubes to the bucket

Rip off a 1 to 2 foot piece of foil and loosely roll it up into a tube – press foil into seams between toilet paper tubes and bucket to smooth out connections and fill gaps. Tape into place.

Using the same foil forms, compress foil to make longer, thinner ropes to attach where you want the “veins” or more depth. We also folded some of the tubes of foil into a triangular shape with the wide part attached to the top lip or the bottom lip of the bucket to give it more depth as well. Tape down everything securely to avoid gaps and to cover all foil since it is rough when crinkled. TIP: the more you compress your foil and newspaper, the sturdier the outside of the stool will be.

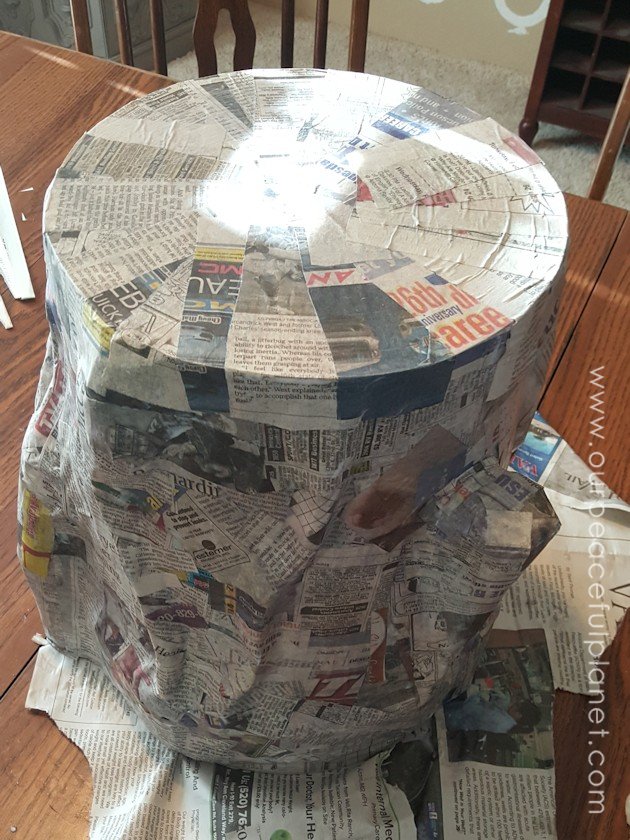
Cut newspaper into strips – most of ours were larger strips, about 1-2” x 5-6”, but we also cut up some 1”x2” pieces for the areas that had more dips, grooves and edges because they lie flatter.


Dip newspaper into mixture, wipe excess off both sides and apply to entire surface of bucket and tubes, layering over one another as you go – this is the most time consuming part as it took about 2 hours (we only did 1 layer). Try to make it as smooth as possible.
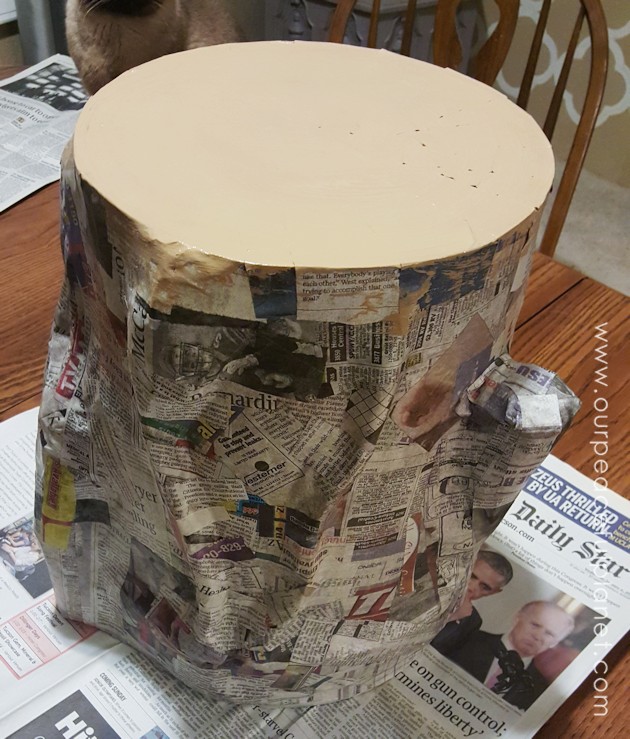
![]() TIP: For long term use, let the layer dry and apply multiple coats of paper mache. This not only makes the paper exterior stronger, but it allows you to be more of a perfectionist since you can trim or sand off imperfections between coats. If you do more than one coat you only need to let the coats dry enough to not be tacky before applying the next coat.
TIP: For long term use, let the layer dry and apply multiple coats of paper mache. This not only makes the paper exterior stronger, but it allows you to be more of a perfectionist since you can trim or sand off imperfections between coats. If you do more than one coat you only need to let the coats dry enough to not be tacky before applying the next coat.
![]()
Paint the rest of the stump with a dark brown, coming up to the inch of tan but not covering it. 
![]()

![]()
The overlay of tan allows you to pull out a smaller brush and, using the same dark brown, paint up to the edges leaving “cracks” of tan. This gives it a more realistic look. 
![]()
For the top of the stump and branches water down some of your light brown and wipe it around the edges of the circle – use your hand or a damp paper towel to wipe it off in a circular motion so that it gives it some light shading around the edges. Using the same watered down brown, take a thinner brush and draw a line around the top of the stool, about ½” in from the edge.

![]()
Continue drawing circles inward, about ¼” to ½” apart until you reach the center. Repeat with cut branches. 
![]()
Once that is done mix the dark brown with some black to darken it and paint in the “dips” and grooves of the stump. You can be far from imperfect with this as it’s just a base coat for shading. We watered down the darker paint a little and put it into every dip and groove, outlining all of the forms we had built up with foil and tape.

![]()
Using a light brown you can now make it resemble a real tree. Notice how we did it in the photos, painting pieces that don’t touch, leaving the dark brown background. This is easy to do and does not require any exact drawing skills.

![]()

![]()
Lastly, let it dry and spray with two coats of Clear Coat or other satin or gloss finish. (We used satin.) This makes it look more professional and also allows for cleaning the surface easier if needed.

![]()
Your tree stump stool can also be used as a small table. 
![]()

![]()

![]()


15 responses
Hi there! I am thinking about using this as a vacation bible school craft for older boys. My question is that we only have 20 minutes over 5 nights. Is it ok to do part of the paper mache one night and finish the other? I’m not sure if they will have time to do the whole stool in one night. Thank you!
Hi Angie! I think that would be fine. It needs to dry in between anyway. But it is a bit of at time consuming process so I’m not sure if that would be long enough of not. I can’t remember how long it took us to finish it.
Good luck!
[…] 5. Paper Mache Tree Stump Stool […]
You’re so talented!! I love this!
Why thank you Christine. Though in this case it was my daughter whose the talented one. Ü Thank you for visiting!
[…] DIY Paper Mache Tree Stump Stool or Table from Our Peaceful Planet […]
This is so creatively awesome!! I love have fun and artsy the tree stump is. I would really love it if you would stop by Celebrate and Decorate and share at our Celebrate Your Story link party! I am pinning this!
Thank you Jenny!
I have to say, this is simply incredible!! I never thought you could make a tree stump like this! Great tutorial!
Thank you so much for sharing at my craft party on Thursday! I pin all your posts! Would love to see your newest posts this week, which starts at 7pm EST.
Thank you Denise. I’ll be there!
This is really cool. I would never have guessed it was a 5 gallon bucket. My kids would love a stool like this! Pinned.
Thanks Kati!
I love it! It looks great, you did a really good job. I want to make one! I’m going to pin it and see when I can do it. Thanks for sharing, I’m a few follower.
Super fun and so creative! I’m sure this took a lot of time and strips of newspaper. Great job! Visiting from Share It One More Time events.
Thanks for stopping by Victoria!