![]() Evidently we make a lot more garbage than normal people because our kitchen trash can is always overflowing. I’ve tried my hardest to find a supersize rectangular trash can but to no avail. I’ve even tried using things like hampers but I can never find just the right one to fit the spot I need or else the bags won’t fit them. So, and here’s another minor embarrassing admission, I finally ended up using a large box. Now, before I hear those snide remarks of “taaaacky”, I did cover it with contact paper. But it was so large it needed those leaf bags to line it, which are black. That was tacky. The good part was we didn’t have to take the garbage out 5 times a day. (The older I get the more I’m amazed how many times utility wins out over aesthetics.)
Evidently we make a lot more garbage than normal people because our kitchen trash can is always overflowing. I’ve tried my hardest to find a supersize rectangular trash can but to no avail. I’ve even tried using things like hampers but I can never find just the right one to fit the spot I need or else the bags won’t fit them. So, and here’s another minor embarrassing admission, I finally ended up using a large box. Now, before I hear those snide remarks of “taaaacky”, I did cover it with contact paper. But it was so large it needed those leaf bags to line it, which are black. That was tacky. The good part was we didn’t have to take the garbage out 5 times a day. (The older I get the more I’m amazed how many times utility wins out over aesthetics.)
Anyway, I used the same cardboard box for probably 4 years. In our current house we had moved our fridge and were able to put it in between the stove and our armoire pantry. Yes, you hear right and can read about that in our simple DIY pantry). But when we put in our new pantry the fridge had to go back where it initially was and we were left with no place to put our box trash can with the leaf bag. So we build a new one. It was super simple and filled the thin space between the stove and fridge. I also went on a search and found clear large leaf bags to fit it! Watch how we did it below. You might also enjoy the earlier part of our outdated kitchen transformation which this is part of.
Kitchen Trash Can Supplies
- 1/4″ thick Luan Plywood
- 1″x2″ cut in half for bracing pieces
- Table or Jig Saw
- Stapler that also does Brads (We own this manual one and its great!)
- Wood Glue
- Swivel Caster Wheels (ours took the 2″ size)
- Handle Any type you like. We used an old one we had.
- Paint
- Clear Bags 100 33 gallons (or whatever fits your trash container)
![]()
Instructions
This is my “box” trash bag covered in contact paper. I carried this through three houses, believe it or not. The black bag doesn’t help much.

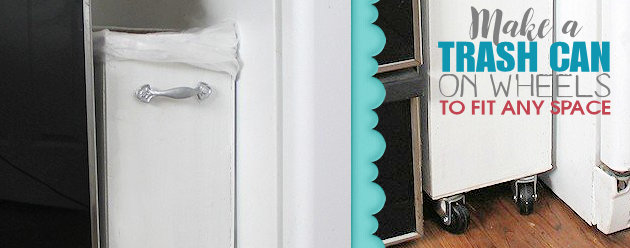
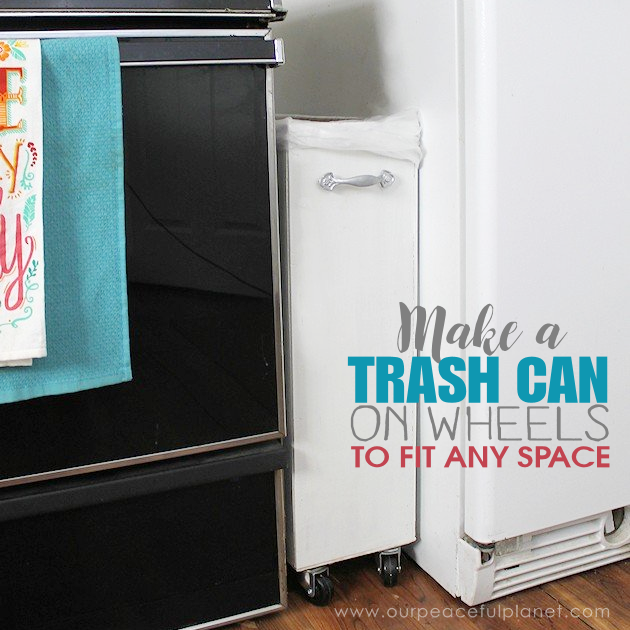
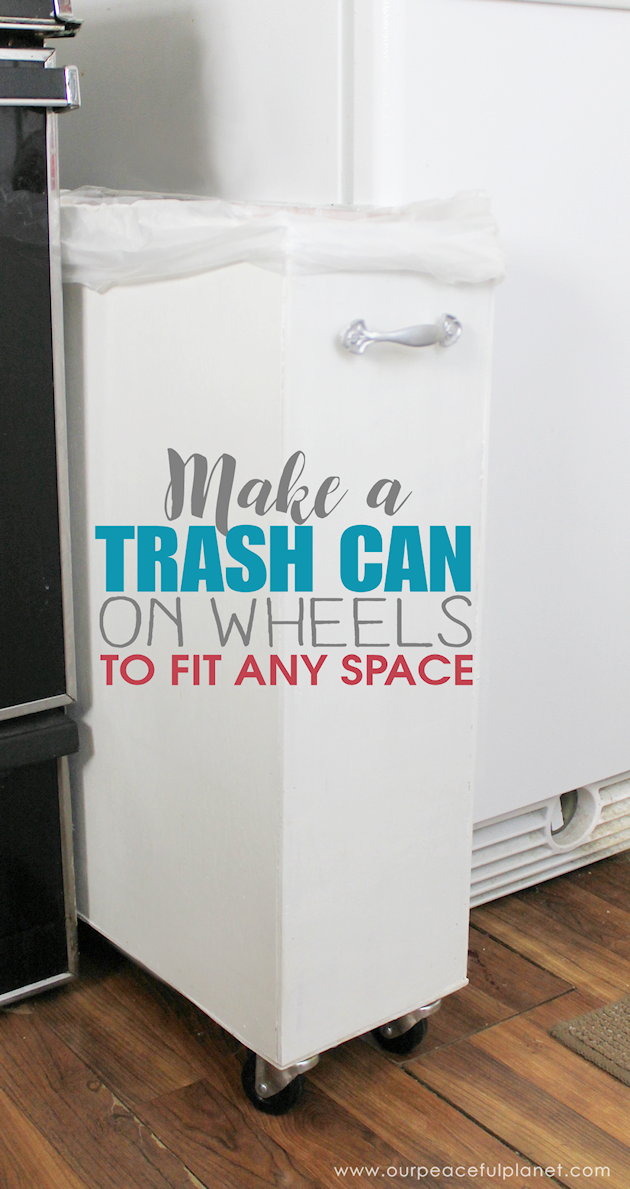
When we redid our kitchen the fridge was moved back where it belonged to allow for our new pantry so we only had a small skinny place for the trash can. Roy measured it up and set out to design a trash can to fit that area. 
The bracing pieces were glued on then a brad stapler was used. 
Cutting the side pieces. 
More gluing and stapling of brads into the container.
It went together fairly quickly once the pieces were cut.
The last side piece was placed on and then the bottom.  The trash can was painted.
I had some old handles which and I painted one of them silver, as you can see, to use for the front of the trash can.
We used a 2″ set of swivel wheels. 
Wheels were screwed into the bottom corners.
The handle was attached to the front. 
![]()
Slide it into your space!
![]()

![]()
![]()