![]()
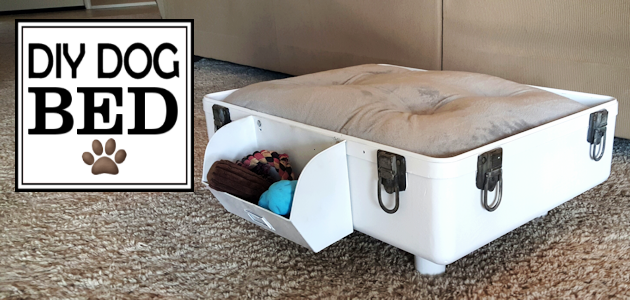
 We’ll show you how to make a DIY dog bed from a suitcase! It’s a fun project that you can style however you like. With the attached toy holder made from a mail bin, your pup will love it!
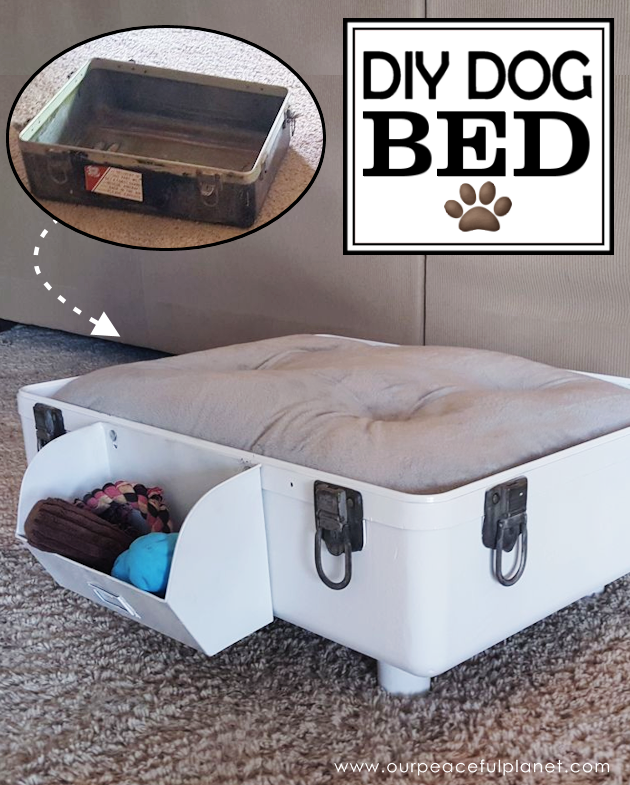
The one shown is made from a military shipping case which was perfect, but any straight sided suitcase without padding would work. You just need half of it. We’ve got step by step photos for you to follow along with. Once you’ve completed this project you can make a set of matching personalized dog bowls! ![]()
![]()
 DIY Dog Bed Supplies
- 1/2 rectangle type suitcase or military shipping container (found at thrift store)
- 2" wooden dowel cut down for legs
- 2x4 (cut down for inside brace)
- Peg board (cut down for pillow top)
- Old pillow
- Thick soft fabric to cover the pillow stuffing.
- Button Kit ( to make matching buttons from same material.
- Spare old buttons for the bottom of the tufting under the peg board
- Screws
- Spray paint
- Staple gun
- Scissors
- Mail holder bin (attached for toys)
- Clear coat
Visual Instructions
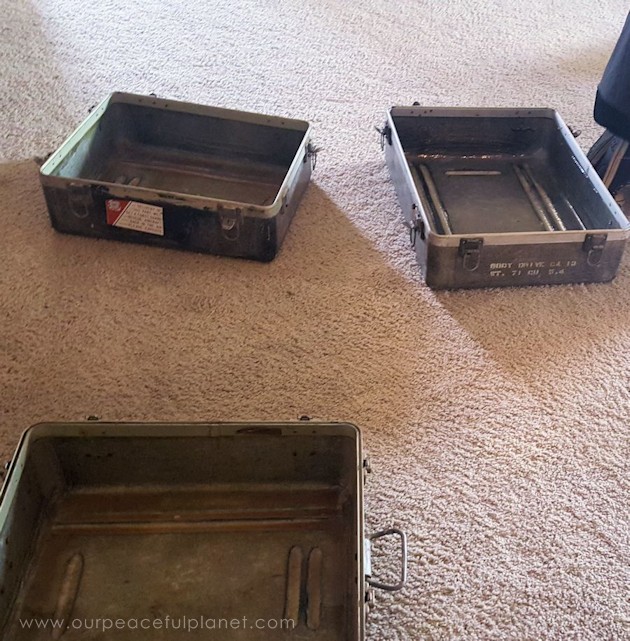
I found these military shipping containers at a thrift store.
![]()
Tape off any areas that you don't want painted. I liked the vintage look of the hinges so I decided to keep them. Then spray paint the container your color of choice. I recommend at least two coats.

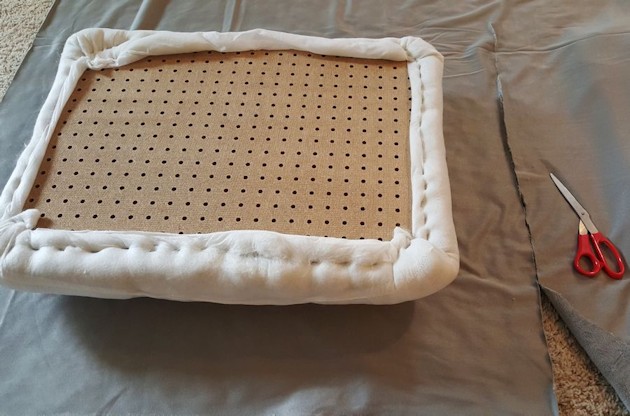
Measure the interior of the container and cut your peg board to fit. Try to align the holes evenly from each edge so that you can accurately measure for your buttons when it comes time to do the tufting. Uneven holes mean uneven buttons.
![]()
I used a reciprocating saw to cut the shape but a circular saw would work just as well.
![]()

![]()
An old standard-sized pillow was used to create the padding. Depending on the size of your container you may need to remove some of the filling from the pillow or use a larger one. Either way, cutting a small hole in the pillow will allow you to reach a hand in and reshape the filling, which can sometimes be uneven and bunched up.
![]()
Be sure to check both sides as you staple to ensure that the pillow lies evenly. Adjust the filling as you go if needed.
![]()
Be sure to pull the pillow tight around the edges. If too much of the filling wraps around the edges as you staple, then your bed top may not fit into the container.
![]()

![]()
![]()
Trim off the excess material after stapling to prepare for the fabric.
![]() Folding over the edges of the fabric prior to stapling gives the bottom a more finished look. I would recommend placing staples no more than 1/4" apart to ensure they hold up over time.
Folding over the edges of the fabric prior to stapling gives the bottom a more finished look. I would recommend placing staples no more than 1/4" apart to ensure they hold up over time.
![]()

![]()
Measure for buttons and circle the peg holes prior to tufting to ensure they are evenly aligned. Then thread a long needle with a thicker thread and tie an old button to the end. Thread the needle up through the marked holes on the bottom and then re-insert it about 1/8" away from initial point, back through the same peg hole beneath. You'll have to press down hard on your pillow padding to get it through. You'll want to do this twice, adding your finished button to the top on your second round. Once you have pulled it back out of the bottom for the second time, the attached button gives you leverage to pull the string tight and create your tufted look. Then wrap the string around the button a few times, tie it off and cut.
![]()

![]()

![]()
Second time out, string through your button and reinsert.
![]()

![]()
Measure the length of your container and cut two 2x4's to fit inside of it lengthwise. If you are using a shallower container you may need to use 2x3's or even 2x2's. Keep in mind that they should rest on the bottom of the container and their tops should be at least 1" below the top of the container.
![]()

![]()

![]()
Outline where your support beams will go and drill holes so that you can attach them with screws.
![]()

![]()

![]() With the support beams firmly mounted to the interior of the container, place the pillow inside. It should be a tight fit so be sure you don't tear the fabric as you press it into place. The peg board bottom should rest firmly on the supports below. If everything lines up, remove the pillow and prepare to install the feet.
With the support beams firmly mounted to the interior of the container, place the pillow inside. It should be a tight fit so be sure you don't tear the fabric as you press it into place. The peg board bottom should rest firmly on the supports below. If everything lines up, remove the pillow and prepare to install the feet.
![]()

![]() I opted for a simple 2" dowel for the feet, cut down to 3" lengths.
I opted for a simple 2" dowel for the feet, cut down to 3" lengths. 
![]()

![]()

![]()

![]()
Measure and mark where the feet will go. Drill holes through the container to attach the feet. If you purchase self-tapping screws you may be able to screw the legs on directly through the container depending on what materials the container is made of. Being that mine was a metal-like fiber glass I opted to pre-drill small holes and used the self-tapping screws
![]()

![]() Once complete, spray paint the legs and apply a clear coat to protect the bed from scratches. I would recommend at least 2 coats to hold up against little paws and the occasional cleaning. I suggest using clear coat over it when finished for added protection.
Once complete, spray paint the legs and apply a clear coat to protect the bed from scratches. I would recommend at least 2 coats to hold up against little paws and the occasional cleaning. I suggest using clear coat over it when finished for added protection. 
![]() Right before I put my top back on I opted to attach a small mail bin that I picked up at a craft store for $5. This gave me a place for my dog toys and a name plate. I spray painted it the same white and installed it to one side of my container by drilling holes and using some old, small bolts.
Right before I put my top back on I opted to attach a small mail bin that I picked up at a craft store for $5. This gave me a place for my dog toys and a name plate. I spray painted it the same white and installed it to one side of my container by drilling holes and using some old, small bolts.
![]()

![]()

![]()

