
![]()
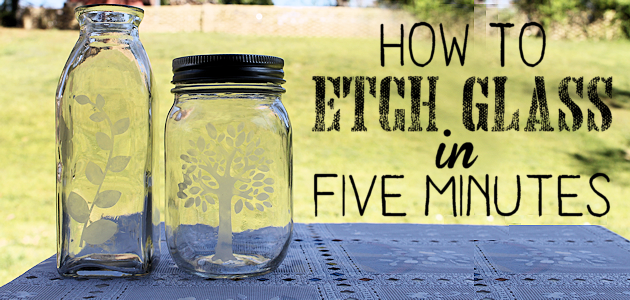
I’d always wanted to learn how to etch glass but assumed it was difficult, taking all kinds of funky chemicals and a lot of time. Silly me. 5 minutes. That’s how long it took me. After my first one I proceeded to search the house looking for things I could etch designs onto. It’s a bit addicting.
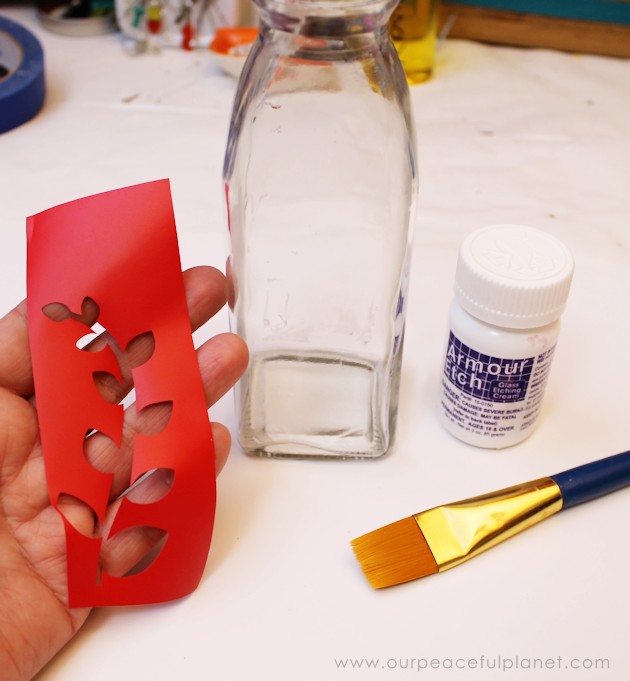
 It does require etching cream and sticky type stencils. A small bottle of the etching cream lasts a long time. If you have a cutting machine, such as Silhouette, you can make your own stencils, which is what I did. (Hint: Grab your etching cream at Michael’s or Hobby Lobby using a 40% coupon.) FYI You can grab the free sketching images below. There is a pdf version and a Silhouette cutter version.
One fun use for etching is to decorate up your own personal glass water bottles. You can also learn Why Glass Water Bottles are Better!
![]()
Supplies for Etching Glass
- Etching Cream (A small bottles lasts a long time.)
- Sticky Stencils (or use a cutting machine to make your own such as a Silhouette)
- Paint brush
- Glass stuff to etch on
Download
Silhouette studio3 File (zipped)
Instructions
The stencil is adhesive vinyl I cut myself on my Silhouette machine. You can purchase all types of designs.
![]()
Carefully adhere your stencil /label to your object.
![]()
Apply the etching cream over the open parts. You don’t want it too thin. Be very careful not to get the cream on your skin. Wash your brush with water when done. 
![]()
You can let it sit from 2 to 3 minutes according to the directions, though the time can vary. I did 5 minutes. After that time rinse off the cream.
![]()
Rub the remaining cream off with a sponge.
![]()
Remove the stencil and give it a final cleaning. NOTE: You won’t be able to see the etching well until the glass is dry. That’s it!
![]()

![]()

![]()

