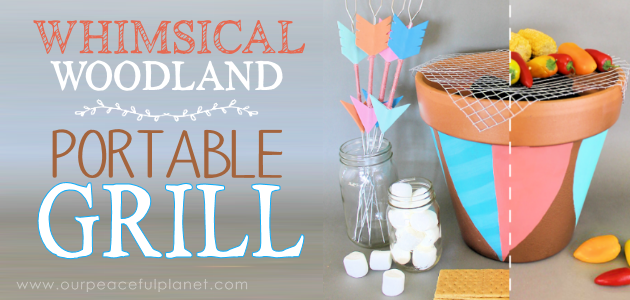
![]() Make your summer sensational with this stunning DIY portable grill and skewer set! It’s a larger version of our Mini Campfire Smores Kit. This one is an inexpensive whimsical addition to your backyard barbecue. Not only is this simple and cost-effective, but it is sure to be a great conversation starter at your next get together. Great for every day grilling and late night S’mores on a warm summer evening. You won’t believe how easy it is to make.
Make your summer sensational with this stunning DIY portable grill and skewer set! It’s a larger version of our Mini Campfire Smores Kit. This one is an inexpensive whimsical addition to your backyard barbecue. Not only is this simple and cost-effective, but it is sure to be a great conversation starter at your next get together. Great for every day grilling and late night S’mores on a warm summer evening. You won’t believe how easy it is to make.![]()
Portable Grill Supplies
NOTE: Make sure you buy a typical heavy clay pot with no glaze on the inside. They are put through a kiln so will withstand high temperatures as long as the change is not sudden. Never put water on the briquettes when finished as the sudden temperature change will crack the pot. Also, NEVER touch the pot when cooking as it gets very hot.
- 12″ Plain Clay Pot (The one shown was $6.00 at Walmart)
- Charcoal Briquettes
- Rust-Oleum High Heat Spray Paint (For inside the pot. Comes in various colors.)
- Copper Spray Paint
- Acrylic Paints of choice (we used two shades of teal and a coral)
- Foil
- Welded Wire Mesh with 1/2″ grid that will be cut to 11.5″x 11.5″ (can be purchased at most hardware stores by the foot.)
- Wire cutters
- Set of 4 wire skewers ($2 at Walmart)
- Sticky Back Craft Foam Sheets
- Craft String or yarn
- Pattern download (below)
 Download

Instructions

![]()
Though not shown on this pot this step is IMPORTANT if want the outside of your pot to not darken and discolor. Spray the inside of it with a high heat spray paint. It comes in a variety of colors. 
![]() Spray the exterior of the pot with a metallic spray paint and let dry overnight.
Spray the exterior of the pot with a metallic spray paint and let dry overnight.

![]()
Download, print and cut out the stencils provided above.

![]() Align the top (flat side) of the leaf-shaped stencil just below the lip of the pot.
Align the top (flat side) of the leaf-shaped stencil just below the lip of the pot.

![]() Using a light but visible marker, trace the leaf stencil onto the pot.
Using a light but visible marker, trace the leaf stencil onto the pot.

![]() Repeat the process above, leaving a 1 1/2″ gap between stencils. When complete, there will be 4 outlines of this stencil surrounding the pot.
Repeat the process above, leaving a 1 1/2″ gap between stencils. When complete, there will be 4 outlines of this stencil surrounding the pot.

![]() Using a ruler, draw a line down the center of each leaf outline, creating a geometric ‘leaf’ look.
Using a ruler, draw a line down the center of each leaf outline, creating a geometric ‘leaf’ look.

![]()
Using the acrylic paint, fill in half of each ‘leaf’ with a separate color. This may take 2-3 coats.

![]()
Once the paint is dry, dilute a small amount of a lighter colored acrylic paint with water. Using a 1″ brush, lightly apply angled stripes to a few of the leaves. Pictured below, the lighter teal is applied to the dark teal sections only.

![]()
Gather the supplies for the skewers .
![]()
Cut out the arrow stencils provided above. Trace two of each pattern piece onto each color of sticky-back craft foam.

![]()
Remove backing paper and apply the sticky side of the foam ‘feathers’ just below the handle of the skewer.

![]()
Repeat with the second piece, cut from the same color and shape. Press sticky sides together to seal into place around the skewer.

![]()
Using the same method, place the ‘arrow’ tips roughly 5″ down from the ‘feathers’. Use an alternate color for the arrow tips. Be sure that the tip of the arrow is at least 8″ away from the tip of the skewer. Placing them too close to the end will cause them to melt during use.

![]()
Cut three small triangles out of each side of the ‘feather’.

![]()
Using the craft string, tie a knot near the tip of the arrow and begin to twist the string around the center section of the skewer. Tie a knot at the finished end to hold into place.

![]()
Roll out the welded wire and bend it into shape. The goal is to get it to lie as flat as possible across the top of the pot.

![]()
Using wire cutters, cut the welded wire into a 11 1/2″ x 11 1/2″ square.

![]()
For ease in handling, clip down protruding wires around the finished square.

![]()
Place the cut sheet of welded wire, centered, on top of the pot. Firmly bend down the four corners of the wire to hold it in place.

![]()
Lift the wire off and place a sheet of tin foil in the bottom of the pot to prevent debris from falling through the hole.

![]()
Tear off 3 or 4 sheets of tin foil, roughly 4 feet long. Lightly crush them into a tube or ‘snake’ shape.

![]()
Roll the tubes of foil into coils and place in the bottom of the pot.

![]()

![]()
Place briquettes on top of foil. Only one layer of briquettes is needed.

![]()
The portable grill in use!
![]()
The finished portable grill is wonderful for all kinds of things from hot dogs, and hamburgers to roasted veggies.
![]()
For dessert use the arrow skewers with your portable grill and roast marshmallows!
![]()

![]()

