
![]()

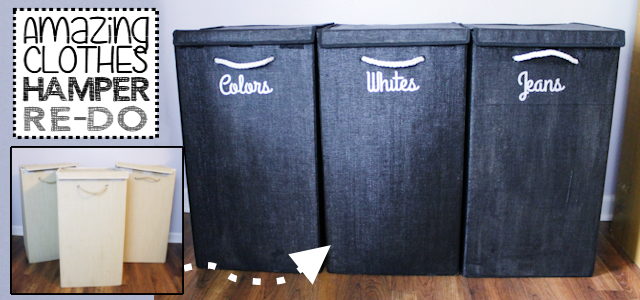
This Clothes Hamper Redo shows that there’s not much you can’t make look new again if you try! I’ve had this set of clothes hampers for about 8 years and I love them. I got them on Amazon and paid about $18 each back then. At this point in time they were still very functional but a bit wore out so when I did my Budget Bedroom Makeover. I knew I’d need to replace them with something nicer that matched.
I headed to Amazon again but the only type I could find that were this size and black were these. At $27 bucks a pop (and I needed four of them) it seemed like a poor choice for a “budget” makeover. That’s when I began to wonder if I could give the ones I have a face lift. I got with Roy and he said he could put a small wood brace on the inside to make them sturdier. After he did that I decided to test one and see if it would hold paint well and it did! Below are the simple steps I used for my clothes hamper redo. Grab our free files below if you’d like to use the same lettering. We have it as a PDF and in Silhouette version!
![]()
![]()
 Supplies Used for Clothes Hamper Redo
I had everything but the paint.
- Quart of black paint $8.50
- 12 thin wood strips for each one
- two sets nuts and bolts for each one
- White rope
- Labels
Download
Download the same text shown. There is a pdf version and a silhouette file version.
 [sdm_download id="23556" fancy="0"]
 [sdm_download id="23557" fancy="0"]
Visuals

I chose a gloss paint. It took three coats. 
![]()
I was wondering what I would use for new handles when I saw a bunch of leftover rope we had purchased a week before to use for something else. It was perfect! I braided it and had new handles in no time.
![]()
I tend to label my containers in some way, as you can see from my photo from 2008. For these I decided to use my Silhouette cutter. I wanted the labels silver and I didn't have silver paper. So I took a sheet of white cardstock and lightly spray painted it silver. Then I cut out my text using my machine and used spray glue to attach it.
I found this old photo of my hampers from 2008.
![]()

![]()

![]()

![]()

![]()

![]()

![]()

![]()

![]()

