![]()

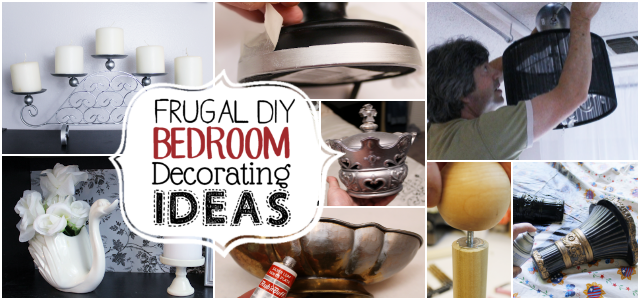
This is the 5th installment of our Budget Bedroom Makeover Series. This week I’ll show you how to turn items you already have into new and beautiful decor pieces and how small thrift store finds can add some special touches. You’ll learn how to make a curtain rod with a dowel and wood ball and how to give old shelves a quick facelift. That’s just a little of what’s waiting for you below! With a little paint and other low cost items you’ll be on your way to your own makeover in no time! As a side note this post does not include my twinkle lights or my bedroom wall ideas as we did a previous separate post on each of those items.
![]()
![]()
Supplies Used & Cost
These are only the items I purchased for my bedroom. Everything else shown I already had. Use this as a jumping off point for your own inspiration!- Wood Dowel, T-nuts and screws, tow 2″ wood balls with one flat side (for curtain rod) $8.00
- Rod holder set These holders can be expensive but I found a cheap white set on Amazon. $3.28
- Silver Curtain Panels purchased new on eBay $15.29
- Silver spray paint $3.98
- Silver Rub n Buff $6.68
- Contact paper for back of shelves $5.99
- Ceramic swan from thrift store $1.00
- Gold dish from thrift store $1.00
- Black and White Photo Reprints $6.00
 TV Shelf
[caption id="attachment_18845" align="alignleft" width="209"] My TV Stand Before the Update[/caption]
I have a TV in the bedroom. Up to this point it was sitting on one of my short black shelves. Here is an older and poor photo of how I had been using it. Not the most attractive setting. My daughter Jennifer gave me a brilliant idea. She suggested I move my tall black shelf in it's place and use a middle shelf on it to hold my TV. So Roy set to work making that happen!

Ceiling Light
We had a huge old fashioned ceiling fan in the room. Roy had to remove the blades from it in order to put up our DIY Bed Canopy. I had an old black hanging lamp that had been in storage for a few years. It was perfect for the room. All Roy had to do was cut the cord on it and rewire it into the ceiling light fixture. Much better!
Make a Curtain Rod
Nice heavy curtain rods for grommet curtains are pricey so I decided to make my own. As there is only one skinny window in the room, a dowel worked fine. I cut the dowel to length then drilled holes in the ends. I insert double ended screws into the wood balls then hammered in the T-nuts into the dowel ends and placed the wood balls into them. You could actually just glue on ball onto one side as only one end needs to come off. I then white washed it for the look I wanted. I tried to come up with a way to make my own rod holders, as those are also expensive, but I couldn't' figure out anything. With a little research I ended up finding an inexpensive set on Amazon for $3.28. They were white and perfect as is.

Back of Door Rack
I love hooks and wanted a rack of them on the back of the bedroom door. I had this old one that I wasn't using and decided to give it a paint job to match my room. The board was painted black and I painted the hooks and screws silver.
Shelf Backdrops
I had three shelves in my room, two small ones and then the tall one I used for my TV. As they were all solid black I wanted to do a little something to break that up. So I purchased some contact type paper on Amazon for $6 and covered the back panels on the top two shelves of each of the smaller ones. I didn't do anything else as that would have made it too busy. It was just enough to spice things up a bit.
Pictures & other Decor Items
I've had these black lamps for years. I just added a strip of silver on the bottoms.


Frames, frames, frames! My house is filled with photos of the family. However, in the bedroom the only photos I place in there are of Roy and I as that's "our" space. I took old frames and repainted them or used my silver Rub N Buff on them. Then I had 5"x7" reprints made of old photos of Roy and I and placed them around the room. 
![]()
This is one of those old fashioned metal frames I recolored and Roy hanging a wall mirror that I already had. It was the right color as is. 
![]()

![]()
Another item I spray painted silver. The inset photo shows it from 2008.

![]() The "Roy Loves Nancy" art was a drawing done by Roy in 1977 before we got married. I scanned in the original, printed it, and placed it in a frame I had painted. I already had the jar on the right. I spray painted the lid.
The "Roy Loves Nancy" art was a drawing done by Roy in 1977 before we got married. I scanned in the original, printed it, and placed it in a frame I had painted. I already had the jar on the right. I spray painted the lid. 
![]()
You might recall my Decorating For Couples post where I showed a past bedroom of ours and how I decorated it so that Roy and I would both enjoy the room. I'm still using the same nude fairy artwork I had in that room.
![]()
This is my other large fairy photo between my repainted sconces.The interesting thing about this photo is after I purchased it, I realized that the sleeping fairy looks exactly like me in my younger days.

![]() I had all these items already. I only had to repaint the hanging photo frame. I did cut out and add the DREAM word you see in the candle.
I had all these items already. I only had to repaint the hanging photo frame. I did cut out and add the DREAM word you see in the candle. 
![]() This is one of my two small shelves. On the bottom shelf is an easel holding a stone sun. I painted the easel. I had the other items you see that I've not already mentioned.
This is one of my two small shelves. On the bottom shelf is an easel holding a stone sun. I painted the easel. I had the other items you see that I've not already mentioned.

![]()
Items I already had.

![]()
Fairy statue I already had.
![]()
Our wedding photo with a quote that I've always loved.
![]()
This is my other small shelf. I found that swan at a thrift store. I was going to paint it and decided it was perfect as is. The candle holder was also from a thrift store. ![]()


8 responses
[…] Clothes Hamper Redo Frugal DIY Bedroom Decorating Ideas Cheap & Classy DIY Bedroom Wall Ideas It’s Easy to Make DIY Twinkle Lights in Jar… […]
[…] Get verbal on your walls with unique wood slice DIY room decor. This wall art costs virtually nothing and is simple to make. It can be used for names, positive thinking reminders, holidays etc. And what a wonderful gift! Its possible you have access to a nice sized branch you can use. It’s a wonderful way to inspire and remind. If you would like more ideas, check out Frugal DIY Bedroom Decorating Ideas. […]
[…] them on one fell swoop! And if your looking for other great inexpensive fix-up ideas check out our Frugal DIY Bedroom Makeover Ideas and our Classy Living Room Ideas on a […]
You sure kept me enthralled looking at all your incredible and improved do-overs. Love they were all things you already had. With all the “stuff” I have already, here and there (shed) should have plenty to re-do. Ah to spray paint/reinvent our treasures, makes me so happy. Love it when I can reinvent something to look different and renewed, save money and freshen this joint up a bit.
Do you get tired of things/decorations you’ve had around for while? Know I sure do, switch things to other rooms, paint, whatever can think to do.To me that’s more fun , makes me happier than going out to buy new unless it’s thrift store which to me is like new. What did we do before thrift stores were so popular?
I want to make your branch/word decoration, love simplicity and of course it being inexpensive, sure glad I clicked on your party entry. The beads on hanging letters is awesome looking.
Have great rest of week and before you know it will be weekend.
Hi JaneEllen! Thanks so much for the lovely comment. I don’t really get tired of reusing decor items because I love changing how they “look” with paint to fit a new room. Feels kinda magical to me. Turning something old into something new! 😛 I do buy things now and then but I know many readers need budget ideas so I always try to keep that in mind and show how much you can do with what you have. Thanks so much for following our blog!
[…] Get verbal on your walls with unique wood slice DIY room decor. This wall art costs virtually nothing and is simple to make. It can be used for names, positive thinking reminders, holidays etc. And what a wonderful gift! Its possible you have access to a nice sized branch you can use. It’s a wonderful way to inspire and remind. If you would like more ideas, check out Frugal DIY Bedroom Decorating Ideas. […]
I love this so much! I’ve been meaning to spruce up my bedroom for some time now but have been putting it off because I don’t want to spend too much. Love the mirror on the way – I think that will be my first project
Thanks Sarah! So glad it inspired you. Ü Thanks so much for commenting.