![]()
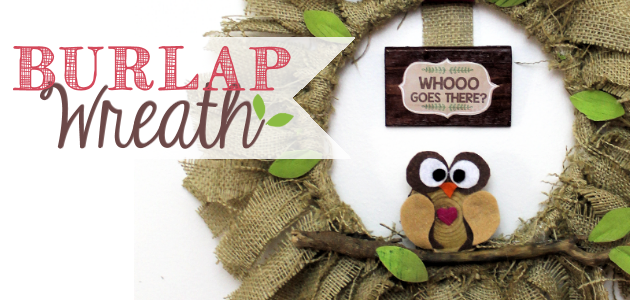
Quickly & inexpensively decorate your door or walls with this darling owl burlap wreath! All you need is a little burlap material & one side of an 8″ embroidery hoop! We decorated it with our Whimsical Wood Slice Owls. They are so easy to make, you could make one for each season!
If you’re looking for other simple wreath ideas, check out our Inexpensive Fall Wreath!
 Burlap Wreath Supplies
- 8″ Wood Embroidery Hoop
- Burlap Material (not too thick so it can be tied easily)
- Hot Glue Gun
- Ribbon for hanging, 1/2″ Wide
- Material scissors OR a Rotary Cutter (Makes it go much faster!)
OPTIONAL DECOR FOR THE BURLAP WREATH
You can decorate the wreath however you like or use our specific idea below.
- Small rectangle piece of wood 3.5 x 2.5 (for sign)
- Wood Slice Owl Decor with Whoo Goes there Sign (3″ slice)
- Twig 8 to 10″ about 1/2″ thick
- A few fake leaves
- Paint for wood
- Mod Podge for label.
 Instructions
This is all you need for the basic wreath itself. (And you only need one of the rings!)

Cut approximately 35 1″ burlap strips approximately 12″ long. We trimmed ours an inch or two after completion so the burlap would stick out more. 
I started with regular sewing scissors then pulled out my rotary cutter. Much faster if you have one!
You may be able to use less or need more of the strips, depending on the type of burlap you use. 
Take a strip and fold it over as shown, under the hoop. 
Pull the bottom two ends through the loop.
Cinch the strip up.
This is how it should look. 
Repeat the process with each strip, pushing them close together as you go.
Trim the strings that show on the inside. The outside strings are supposed to show. 
Make a whimsical owl and gather an 8″ stick, a few artificial leaves and your plaque, printed sign and ribbon for hanging. 
Click image below to view our quick owl tutorial!
Glue three leaves onto your stick, or as many as you wish, then glue your stick to the bottom of the wreath, aligning it so that the owl can site just behind it, glued to the inner wreath itself and appear to be sitting on the stick. 
Carefully place your stick across the bottom of the wreath. Attach leaves. Using a large amount of hot glue, glue the bottom of the owl so that it sits just behind the stick, nestled on the inside of the wreath itself.

Again, the owl is not glued to the stick itself but onto the inner wreath just behind it.
To give the owl a bit more stability you can glue part of a tongue depressor to the back of the owl and the wreath itself. 
Add a few leaves around the wreath. 
Attach a ribbon for hanging. 
Paint your wood plaque. 
Cut out the downloaded label and Mod Podge it on.
Attach it to a piece of burlap and hang it to the top of your wreath. 
![]()

![]()


9 responses
7uotry
I love this idea. It fits into my Decor.
Your wreath is adorable. It would go great with the owl decor in my daughters room.
I love using embroidery hoops for wall art! This is adorable. Pinned and shared. Visiting from Homesteader Blog Hop.
Thank you Carol!
That is so flippin cute!! Thanks so much for sharing it with us at the DI & DI Link Party.
sto cominciando ad imparare ad usare il pc. Tu sei brava, bella la ghirlanda!
I love this wreath! The owl is my favorite! 🙂
[…] How to Make a Quick Burlap Wreath with an Embroidery Hoop says: October 11, 2016 at 2:00 am […]