![]()
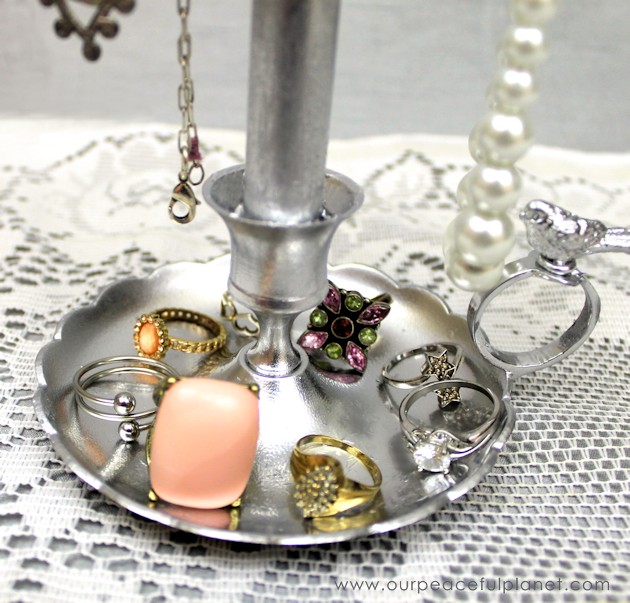
Make this beautiful, classy jewelry stand from something you can find at almost any thrift store… an old fashioned candle holder! I’ve yet to be in a thrift store where I didn’t come across several of these candle holders, usually for $1.00. With some dowels and a little paint you can turn them into a wonderful jewelry holder that even has a dish at the bottom for rings! (FYI: Get one with at least a 4″ base so that its sturdy!)
Jewelry Stand Supplies
- Old fashioned brass candle holder with larger base.
- 3/4″ dowel cut to 10″ (We made do with a 5/8″ and glued it in as it was loose.)
- 1/4″ dowel cut into two pieces, 7″ and 9″
- Hot Glue Gun
- E6000 or another clear solid glue.
- Silver Spray paint (Rust-Oleum has the best metallic look)
- Tiny birds
- Wood ball and wood plugs if desired.
- Sandpaper
- Drill and 1/4″ bit
Instructions
You can almost always find these brass candle holders at second hand stores. You need one with a larger base to be sturdy.

Gather the supplies.
A 5/8″ dowel was used for the vertical, cut to 10″. (A 3/4″ would have fit snugger.) A 1/4″ dowels for the horizontal rods cut to 9″ and 7″. 
Sand the ends of the dowels.
Mark where the holes will be drilled. 1 1/2″ and 4 1/2″ down from the top. It’s VERY important that the holes are lined up perfectly.
It’s also important that you drill the holes, using a 1/4″ bit, exactly straight through with not even a slight angle. Otherwise the rods will not be straight. 
Sand a little if needed.
Slide the rods in. It should be a snug fit. 
As the 5/8″ dowel is a little small it needs to be mounted in vertically. Use glue to hold it up in place. This, however, is not strong enough to hold it permanently. 
Add a thin line of E6000 or other clear solid glue around the base. This will hold it firm. 
You can add some small extras if desired such as these small wood plugs and a wood ball on the top.
Glue them on with E6000.
Use the E6000 glue to attach the tiny birds.
Hold them in place, then allow to dry. 
Glue the wood ball on top the same way.
After everything has dried spray paint the entire stand. 
![]()


![]()
![]()
We have a tutorial for two of the items hanging on our jewelry stand! Charming Soda Bottle Bracelets and our Easy DIY Necklace. 
![]()

![]()


31 responses
Brillliant! thanks so much for sharing on craft schooling Sunday a whole month ago. I am back now after a month unplugged, and the party will be resuming this sunday as well, hope to see you there!
Thanks Sara! Glad you’re back and hope you enjoyed your month off!
I just got rid of one of these! Maybe the thrift store will still have it and I can buy it back. lol
lol! Well they’re usually cheap enough to buy. Thanks Suzy!
[…] Upcycled Jewelry Stand […]
[…] How to Make a Beautiful Classy Jewelry Stand by Our Peaceful Planet […]
[…] How to Make a Beautiful Classy Jewelry Stand by Our Peaceful Planet […]
[…] Upcycled Jewelry Stand […]
[…] Upcycled Jewelry Stand […]
[…] Upcycled Jewelry Stand […]
What a cute idea! I love your creativity 🙂
[…] Elegant Upcycled Jewelry Stand […]
[…] Elegant Upcycled Jewelry Stand […]
Oh Nancy this is such a great idea! I see these candle holders all of the time but had never thought of using them as a base… Thanks so much for linking this up to our Bewtichin’ Projects Block Party this week; I always love seeing your projects. PS I love the little bird!! So adorable!
Thanks Lisa!
repurposed + Organizing = sheer happiness Thanks for sharing at the #ThisIsHowWeRoll Link Party.
Thanks Susan. Ü
What a great idea! You could even add a bit more bling with a crystal knob on top. I love it!
🙂 gwingal
Definitely! Thanks for visiting Nikki!
What a great creation! I never would’ve thought the stands were made from wood dowels. Love the addition of the “birds on a wire”. Visiting from Skip To My Lou party.
Thanks Victoria for the kind words!
This is adorable!! Love it!
Thanks Lori!
This is beautiful and you make it look so easy. I will have to try it, although I’m not the most crafty person. But really, beautiful and so practical! Thanks for sharing!
Thank you Erin. Its VERY easy!
This is a great DIY – typically you could find something like this at HomeGoods. This is nice because you can customize the stand. Thanks for sharing – #HappinessisHomemade
What a clever way to use an old style candle holder. I have one at home and most of the time I have it in storage. This just may be my next project! Thanks for the inspiration!
Thanks Jelica! Yep your all set!
So cute! I love this! Pinning to share.
Thanks so much Kileen! Ü
Thank you. Ü