![]()
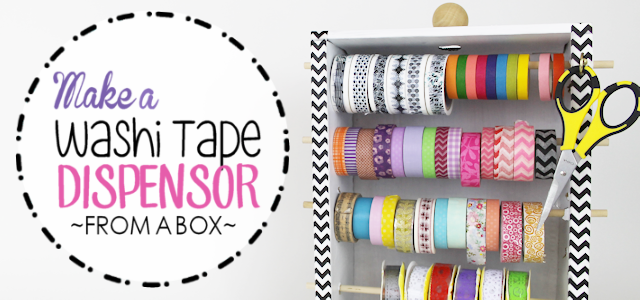
I had a small but growing collection of Washi Tapes that I kept stuffed in a box. The box was nicely labeled but it was getting harder to find what I wanted without dumping it all out and poking through it so I decided to make a dispenser and organizer for it. I used things I already had. A small cardboard box, some dowels and some decorative scrapbook paper. I made two versions, the second of which is the best as I’d worked out the kinks! Cost? $0.00
![]()
All you need is this!

Supplies for Washi Tapes Dispenser
- A small cardboard box. The size is dependent on how many Washi Tapes you have. Try to do some rough measuring ahead of time.
- Ruler
- Decorative paper and/or paint
- Small 1/4" to 1/2" dowels. (Mine are 1/4")
- Glue
- Small metal hook for scissors
![]()

![]()
Free Download
Grab the free pdf sheet with details on how to assemble your washi tapes dispenser. [sdm_download id="18323" fancy="0"]
Instructions
NOTE: Its very important that you measure carefully to allow for your Washi Tapes to hang free and not bump into the next row. I had to redo mine because of placing them too close together. Washi tapes come in various sizes but for the ones shown, the holes on the sides were 2.5" for the tiny rolls and 3.5" for the larger ones. View my diagram below. Again, these are estimates for my own box. Yours will be different. Download the free instruction sheet for more details.SIDE VIEW OF BOX (LAID ON IT'S SIDE)

![]() My first attempt
My first attempt 
It turned out OK but I knew I could do better.

My second attempt. I used a box that some electronic item had come in. I also used a drill this time rather than just an awl. Made a cleaner hole. The dowel should fit in snugly.
![]()


24 responses
well…. this is a VERY GOOD IDEA but…. my desk is soo little good idea bty
Wat een goed idee, ik ga hem zeker ook maken voor mijn lint en 1 voor mijn washitape.
Dank je voor de tip.
Love it. Thanks for the instructions. I’m going to try one for my ribbons too. Love the knob on top of the 2nd one. Well done.
Hello Nancy, just looking at Pinterest and saw this wonderful box for Washi tape. I’m thinking this would also do for ribbon if one doesn’t have an armload!! Did you paint the box? Like the way you made it look like a drawer with the knob on top, easy to carry for sure. You have my mind wandering now. But for now I can get my hands on a box & guess just cover it with white card or something. Anyhow, a wonderful job. Love it.
Thank you so much Claire! I pained one and used contact paper on the other. Since it’s cardboard you need to use light paint. I believe I spray painted mine. Thank you for the kind comment!
Fabulous!!! Love the idea of the box
Thanks Chusca!
This is a great idea and I can’t wait to make one
Thanks Patty!
Great idea, can’t wait to make one for Christmas ribbon!!
[…] Washi Tape Dispenser by Our Peaceful Planet […]
Very good idea! Have you thought about a box with a lid? The lid would keep dust off rolls. Thanks for sharing this idea, I have numerous rolls of ribbon and this will work well.
AA lid would certainty work if they are not used often. Thanks for stopping by Jennifer!
[…] Washi Tape Dispenser by Our Peaceful Planet […]
This is such a great idea! I love how you can see all of the designs you have and it makes it so much easier to use!
Thanks Falon. Appreciate you stopping by!
This is such an awesome idea! I definitely need to make one. Thank you so much for sharing at Best of the Weekend!
Appreciate the comment Ginnie!
Thank you so much for sharing this! Beats just shoving all of my washi tape rolls into a drawer. Lol! Great idea:-)
Katie
You’re very welcome Katie. Ü
Wow! What a great idea! Love it! Pinned it twice….hey, tomorrow night our Wonderful Wednesday Blog Hop goes live. Please come by and share this!
Thanks so much!
Love it! Looks great. I have wash tape envy right now 😀 haha. Just pinned this to my DIY Board! 🙂 Thanks for the inspiration.
Thanks Maria. Ü