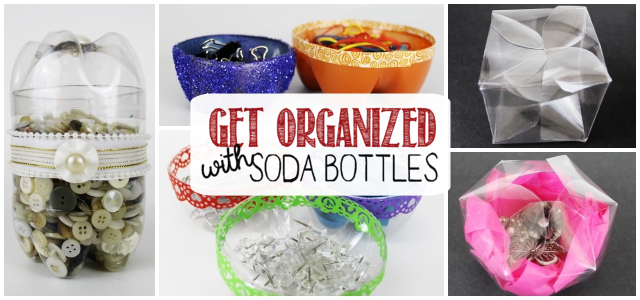
![]() What you need to get organized might very well already be in your house… or your trash can! Soda bottles are perfect for making all types of containers to hold goodies. Use them on your desk, in drawers or hanging on the wall! This is another wonderful way to upcycle.
What you need to get organized might very well already be in your house… or your trash can! Soda bottles are perfect for making all types of containers to hold goodies. Use them on your desk, in drawers or hanging on the wall! This is another wonderful way to upcycle.
![]()
Supplies To Get Organized
 Soda bottles, various sizes. My favorite is the 33.8 oz size.
- X-acto Knife
- Glue
- Spray Paint (optional)
- Washi Tape (optional)
- Dry Erase Marker (for marking your bottle where you want to cut)
- Mod Podge & Glitter (for glittered container)
- Iron (Optional, for melting edges.)
- Good Gone (optional for removing labels)
![]()
Removing Labels
Remove the labels on all your bottles. I've yet to find anything that removes label residue better than Goo Gone. Takes seconds.
Cutting Tips

Smoothing Edges with an Iron
You can seal the edges with an iron to give them a nice rounded finish. It's optional of course but pretty cool and doesn't hurt your iron one bit!
1. Set your iron on high.
2. Press the cut edge of your bottle firmly on the base of the iron for 5 to 10 seconds until it starts to curve.
![]()
 Basic Instructions
Using a black dry erase marker is wonderful for marking your bottle where you need to cut it. Wipes right off when you're done! Most of these are self-explanatory. It's the painting or decorating that makes them extra cool! The general directions are as follows:
- Remove your bottle label.
- Measure and mark with a dry erase marker the places you need to cut.
- Cut carefully with an X-acto type knife.
- Trim around the edge with scissors to make it even.
- Round the edge if needed or desired with an iron.
- Paint, or decorate however you want!
Visual Instructions
Cut and spray paint. Edge with Washi tape or ribbon if desired.


9 responses
[…] Check out these super smart ways to use soda bottles! Who knew you could Get Organized with Soda Bottles? […]
[…] got more ideas for getting Organized with Soda Bottles here. Or check out our entire Plastic Bottle Crafts & Upcycle section! It’s filled with […]
[…] great counting item! The details for making this soda bottle container with lid can be found on our Get Organized with Plastic Bottles […]
These are awesome ideas. You are creative
Why thank you. Ü
Fantastic ideas. I particularly love the scissors holder. Using the iron to smooth the edges is ingenious as the edges can be really sharp for little kids.
Thanks Tamuria!
Great ideas! I hate throwing things away, so this would be perfect. Plus, you can never be too organized. Thanks for linking up at #HomeMattersParty
Thanks Shann Eva. I agree!