
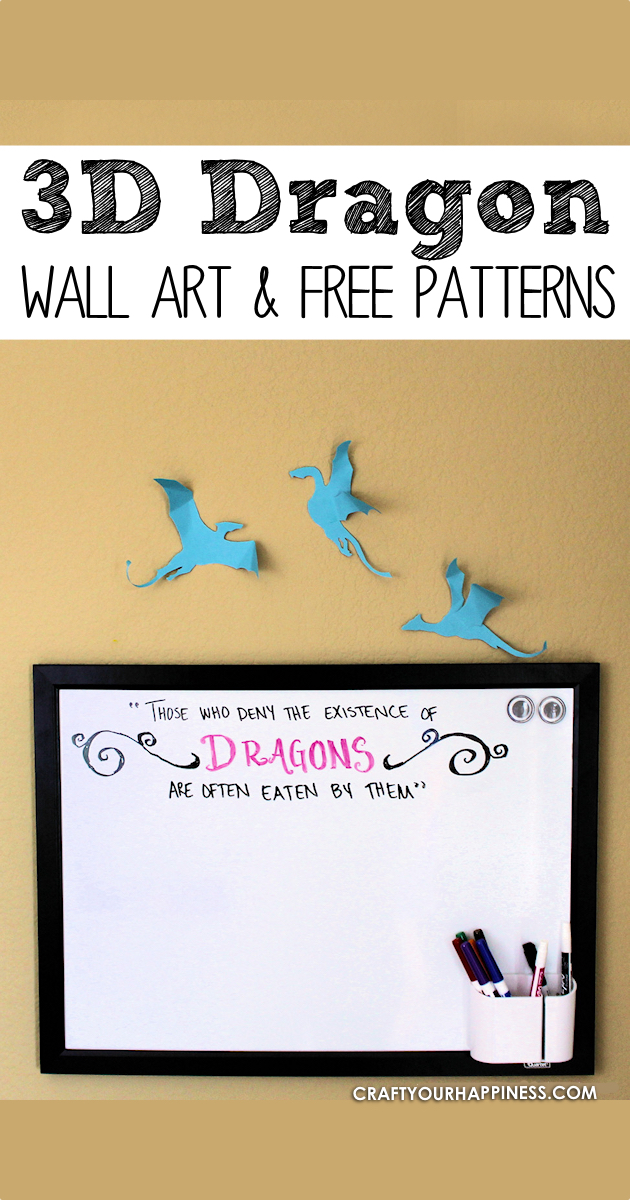
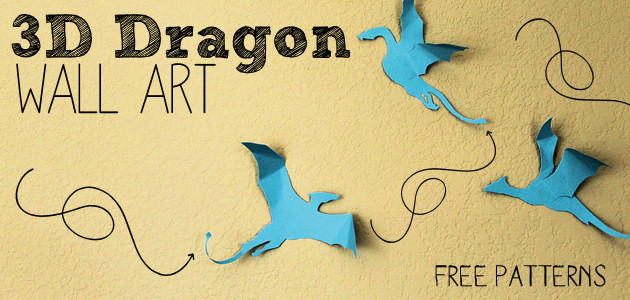
![]() Nothing beats a good dragon craft. Being a fan of things mystical, magical and whimsical, dragons also fall into that category. My home has touches of all these things in most of my rooms, some subtle, some not so subtle. My home office is one of the not so subtle rooms. It’s where I spend a lot of my time and it reflects my likes dramatically and boasts several dragons, most of which are a set of flying one’s on my wall.
Nothing beats a good dragon craft. Being a fan of things mystical, magical and whimsical, dragons also fall into that category. My home has touches of all these things in most of my rooms, some subtle, some not so subtle. My home office is one of the not so subtle rooms. It’s where I spend a lot of my time and it reflects my likes dramatically and boasts several dragons, most of which are a set of flying one’s on my wall.

![]() I purchased the ones you see then realized it would be fairly simple to make my own style. Well, not me personally, but my go to person for this type of thing, my daughter Jennifer. I would ask her to make a set then others who also enjoy all things dragony could have flying dragons on their walls! (I know your out there… or at least your kids are.) So she drew up our own dragons and we made them into a downloadable package just for you. And if you are looking for more dragon things well, of course I have them for you. Check our our Dragon Craft Post making Dragon Eyes! Plus, one of our most favorite posts of all time is our How to Make a Dragon Egg. Every home needs one of these! And they’re so easy to make.
I purchased the ones you see then realized it would be fairly simple to make my own style. Well, not me personally, but my go to person for this type of thing, my daughter Jennifer. I would ask her to make a set then others who also enjoy all things dragony could have flying dragons on their walls! (I know your out there… or at least your kids are.) So she drew up our own dragons and we made them into a downloadable package just for you. And if you are looking for more dragon things well, of course I have them for you. Check our our Dragon Craft Post making Dragon Eyes! Plus, one of our most favorite posts of all time is our How to Make a Dragon Egg. Every home needs one of these! And they’re so easy to make.
Supplies
- Cardstock Black
- X-acto knife
- Detail Scissors These are perfect for cutting small details on paper.
- Tape
- Stick Glue
- Attaching to Wall: I suggest small Command Strips
- Pattern Download Below
 Pattern Download

Video
Image Instructions
Gather your paper color of choice the patterns and your other supplies.

Roll tape back on itself stick side out to adhere the pattern to your paper while to cut.
Using detail scissors, cut out each dragon in this method.
Completed cut dragon.
Carefully remove the template off the top.
You will now bend your dragon where it shows the dotted bend lines on your template.
Curl the tail up using a pencil or something round.
This gives the 3D effect.
On the one’s with wings, bend the wing before gluing in place.
Bend the small flap where it will attach to the dragon.
Add some glue to the small flap.
Press the wing in place.
You can try attaching them to the wall this way but normally it takes a stronger tape to hold them in place for a long period of time. Command Strips work great.
Hang as many as you wish wherever you like!
![]()

![]()
![]()


7 responses
great post i like it
Your article is very useful, the content is also very good, I have read a lot of articles, but for your article it left me a deep impression, thank you for sharing it to the readers.
Awesome. Here is one of my favorite dragon quotes: “Meddle not in the affairs of dragons, for you are crunchy and go well with ketchup.” xD
[…] Get Your Free Download for an Amazing 3D Dragon Cr… Darling Little Birdies DIY Room Decor Unique & Simple Tissue Paper Flower Window Tr… How to Make a Butterfly Dream Catcher with Special… How to Make a Keepsake Dog or Puppy Paw Print How to Make a Wondrous Woodland Mason Jar Light .yuzo_related_post img{width:204px !important; height:96px !important;} .yuzo_related_post .relatedthumb{line-height:16px;background:#ffffff !important;color:!important;} .yuzo_related_post .relatedthumb:hover{background:#e8e8e8 !important; -webkit-transition: background 0.2s linear; -moz-transition: background 0.2s linear; -o-transition: background 0.2s linear; transition: background 0.2s linear;;color:!important;} .yuzo_related_post .relatedthumb a{color:#000000!important;} .yuzo_related_post .relatedthumb a:hover{ color:#aaaaaa}!important;} .yuzo_related_post .relatedthumb:hover a{ color:#aaaaaa!important;} .yuzo_related_post .relatedthumb:hover .yuzo__text–title{ color:#aaaaaa!important;} .yuzo_related_post .yuzo_text, .yuzo_related_post .yuzo_views_post {color:!important;} .yuzo_related_post .relatedthumb:hover .yuzo_text, .yuzo_related_post:hover .yuzo_views_post {color:!important;} .yuzo_related_post .relatedthumb{ margin: 0px 0px 0px 0px; padding: 5px 5px 5px 5px; } jQuery(document).ready(function( $ ){ jQuery('.yuzo_related_post .yuzo_wraps').equalizer({ columns : '> div' }); }); […]
Amazing! Nothing beats a good dragon craft!
Amen. Ü
Thank you for these, I love them! There are loads of us dragon lovers out there 🙂 xx