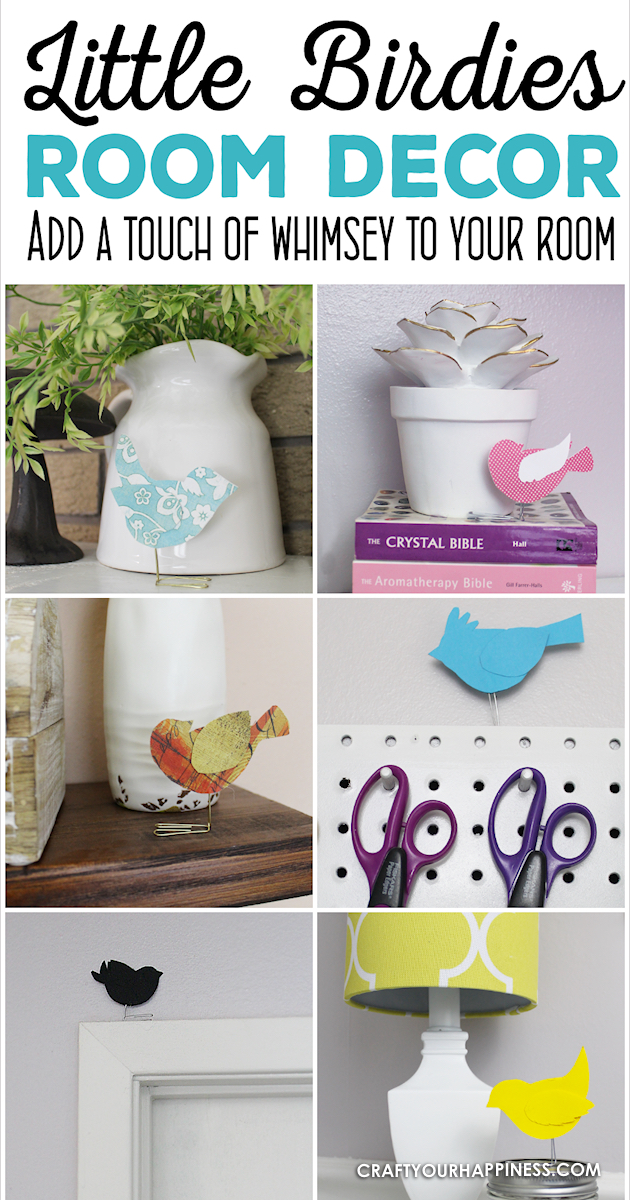
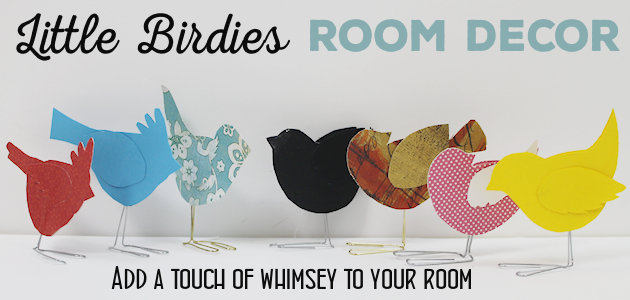
Darling Little Birdies DIY Room Decor

These sweet little birdies are perfect for a touch of whimsy DIY room decor and they can be placed in any room you like! Sit them on shelves, mantles, on top of books... you can even put a row on top of a door jam! Using our pattern you can make whatever colors you like. All you need is the paper of your choice and two paperclips and glue.

These sweet little birdies are perfect for a touch of whimsy DIY room decor and they can be placed in any room you like! Sit them on shelves, mantles, on top of books… you can even put a row on top of a door jam! Using our pattern you can make whatever colors you like. All you need is the paper of your choice and two paperclips and glue. This reminds me of our Peace Dove & Poem which you would think was just for Christmas but when you read the short poem you’ll see it’s  not. While we’re speaking of birds, you might enjoy the short but amazing little personal story with photos entitled A Bird in the Hand.


Birdies DIY Room Decor Supplies

NOTE ON PAPER: You will be pulling the wings out just a bit so if you use scrapbook paper try to use double sided though it might not matter depending on where you place your little birdies.

Birdie Pattern Downloads

pdf

These sweet little birdies are perfect for a touch of whimsy DIY room decor and they can be placed in any room you like! Sit them on shelves, mantles, on top of books... you can even put a row on top of a door jam! Using our pattern you can make whatever colors you like. All you need is the paper of your choice and two paperclips and glue.

Instructions

Gather your supplies.

These sweet little birdies are perfect for a touch of whimsy DIY room decor and they can be placed in any room you like! Sit them on shelves, mantles, on top of books... you can even put a row on top of a door jam! Using our pattern you can make whatever colors you like. All you need is the paper of your choice and two paperclips and glue.

Cut out around each bird set with wing.These sweet little birdies are perfect for a touch of whimsy DIY room decor and they can be placed in any room you like! Sit them on shelves, mantles, on top of books... you can even put a row on top of a door jam! Using our pattern you can make whatever colors you like. All you need is the paper of your choice and two paperclips and glue.

I like to just cut once, so I double my paper. If it’s card stock it can make it more difficult to cut intricate areas though so you might want to just cut each pattern twice.These sweet little birdies are perfect for a touch of whimsy DIY room decor and they can be placed in any room you like! Sit them on shelves, mantles, on top of books... you can even put a row on top of a door jam! Using our pattern you can make whatever colors you like. All you need is the paper of your choice and two paperclips and glue.

I staple my paper to my pattern just to help hold it in place while I cut. You can tape it also.These sweet little birdies are perfect for a touch of whimsy DIY room decor and they can be placed in any room you like! Sit them on shelves, mantles, on top of books... you can even put a row on top of a door jam! Using our pattern you can make whatever colors you like. All you need is the paper of your choice and two paperclips and glue.

I use special detail paper cutting scissors. They help a lot!These sweet little birdies are perfect for a touch of whimsy DIY room decor and they can be placed in any room you like! Sit them on shelves, mantles, on top of books... you can even put a row on top of a door jam! Using our pattern you can make whatever colors you like. All you need is the paper of your choice and two paperclips and glue.

They’re great for getting into the little intricate spaces. These sweet little birdies are perfect for a touch of whimsy DIY room decor and they can be placed in any room you like! Sit them on shelves, mantles, on top of books... you can even put a row on top of a door jam! Using our pattern you can make whatever colors you like. All you need is the paper of your choice and two paperclips and glue.

If you use scrapbook or patterned paper, one side might be white. Keep that in mind when cutting your patterns out so that your pieces face the correct direction.These sweet little birdies are perfect for a touch of whimsy DIY room decor and they can be placed in any room you like! Sit them on shelves, mantles, on top of books... you can even put a row on top of a door jam! Using our pattern you can make whatever colors you like. All you need is the paper of your choice and two paperclips and glue.

  These are all the birds I cut out to match various places around my home. These sweet little birdies are perfect for a touch of whimsy DIY room decor and they can be placed in any room you like! Sit them on shelves, mantles, on top of books... you can even put a row on top of a door jam! Using our pattern you can make whatever colors you like. All you need is the paper of your choice and two paperclips and glue.

The first step is to glue the two bird pieces together. Spread your glue on the top area as shown, keeping the bottom area free of glue. This does not have to be exact.These sweet little birdies are perfect for a touch of whimsy DIY room decor and they can be placed in any room you like! Sit them on shelves, mantles, on top of books... you can even put a row on top of a door jam! Using our pattern you can make whatever colors you like. All you need is the paper of your choice and two paperclips and glue.

Press the second bird first one making sure they are aligned well. If you used paper that has a white side you might need to do a little trimming.These sweet little birdies are perfect for a touch of whimsy DIY room decor and they can be placed in any room you like! Sit them on shelves, mantles, on top of books... you can even put a row on top of a door jam! Using our pattern you can make whatever colors you like. All you need is the paper of your choice and two paperclips and glue.

For each wing piece place a spot of glue on the end where it will attach to the body.These sweet little birdies are perfect for a touch of whimsy DIY room decor and they can be placed in any room you like! Sit them on shelves, mantles, on top of books... you can even put a row on top of a door jam! Using our pattern you can make whatever colors you like. All you need is the paper of your choice and two paperclips and glue.

Place your wing where you want it to be on each side of your bird. These sweet little birdies are perfect for a touch of whimsy DIY room decor and they can be placed in any room you like! Sit them on shelves, mantles, on top of books... you can even put a row on top of a door jam! Using our pattern you can make whatever colors you like. All you need is the paper of your choice and two paperclips and glue.

You can bend the wing out just a bit to give it a 3D effect. Again, if it has a white side don’t bend it too far out.These sweet little birdies are perfect for a touch of whimsy DIY room decor and they can be placed in any room you like! Sit them on shelves, mantles, on top of books... you can even put a row on top of a door jam! Using our pattern you can make whatever colors you like. All you need is the paper of your choice and two paperclips and glue.

 The last part is adding the feet which requires two regular paperclips. You will be bending the inner part up as shown.These sweet little birdies are perfect for a touch of whimsy DIY room decor and they can be placed in any room you like! Sit them on shelves, mantles, on top of books... you can even put a row on top of a door jam! Using our pattern you can make whatever colors you like. All you need is the paper of your choice and two paperclips and glue.

Using needle nose pliers can help. Bend the center part of the paper clip up while keeping the curve where illustrated. The larger part is the foot.I chose gold paperclips for this particular bird. Pinch the foot together a bit as shown. You can either keep the other end as it is if your bird will be short, or you can straighten it out as shown for a taller standing bird.I chose gold paperclips for this particular bird.

Jumbo paper clips can be used but you need to switch which part is used for the feet. The other side will need clipped with a wire cutter also. These sweet little birdies are perfect for a touch of whimsy DIY room decor and they can be placed in any room you like! Sit them on shelves, mantles, on top of books... you can even put a row on top of a door jam! Using our pattern you can make whatever colors you like. All you need is the paper of your choice and two paperclips and glue.I chose gold paperclips for this particular bird. These sweet little birdies are perfect for a touch of whimsy DIY room decor and they can be placed in any room you like! Sit them on shelves, mantles, on top of books... you can even put a row on top of a door jam! Using our pattern you can make whatever colors you like. All you need is the paper of your choice and two paperclips and glue.

To attach the feet to your bird open up the bottom where you did not glue and add a line of hot glue.These sweet little birdies are perfect for a touch of whimsy DIY room decor and they can be placed in any room you like! Sit them on shelves, mantles, on top of books... you can even put a row on top of a door jam! Using our pattern you can make whatever colors you like. All you need is the paper of your choice and two paperclips and glue.

Place the top part of your feet into the glue.These sweet little birdies are perfect for a touch of whimsy DIY room decor and they can be placed in any room you like! Sit them on shelves, mantles, on top of books... you can even put a row on top of a door jam! Using our pattern you can make whatever colors you like. All you need is the paper of your choice and two paperclips and glue.

Being careful not to get burned, press the bird together and align the feet before the glue dries making sure they are even. To make your bird stand requires fiddling with his legs and feet a bit till the right angle is found. These sweet little birdies are perfect for a touch of whimsy DIY room decor and they can be placed in any room you like! Sit them on shelves, mantles, on top of books... you can even put a row on top of a door jam! Using our pattern you can make whatever colors you like. All you need is the paper of your choice and two paperclips and glue.

Where My Birdies Sit

These are where I put my birds though I had trouble with one and couldn’t’ decide. This first little guy sits it my library. He matches perfectly!These sweet little birdies are perfect for a touch of whimsy DIY room decor and they can be placed in any room you like! Sit them on shelves, mantles, on top of books... you can even put a row on top of a door jam! Using our pattern you can make whatever colors you like. All you need is the paper of your choice and two paperclips and glue.

One sits on the mantle in my living room. These sweet little birdies are perfect for a touch of whimsy DIY room decor and they can be placed in any room you like! Sit them on shelves, mantles, on top of books... you can even put a row on top of a door jam! Using our pattern you can make whatever colors you like. All you need is the paper of your choice and two paperclips and glue.
Mr. Cardinal sits on my Chicken Wire Frame Memo Board which, by the way, you can make.

These sweet little birdies are perfect for a touch of whimsy DIY room decor and they can be placed in any room you like! Sit them on shelves, mantles, on top of books... you can even put a row on top of a door jam! Using our pattern you can make whatever colors you like. All you need is the paper of your choice and two paperclips and glue.This little pink one is sitting on my office shelf. I turned his wings around.  These sweet little birdies are perfect for a touch of whimsy DIY room decor and they can be placed in any room you like! Sit them on shelves, mantles, on top of books... you can even put a row on top of a door jam! Using our pattern you can make whatever colors you like. All you need is the paper of your choice and two paperclips and glue.

Then I wondered how he’d look on top of the sign over my door. Now I can’t decide. These sweet little birdies are perfect for a touch of whimsy DIY room decor and they can be placed in any room you like! Sit them on shelves, mantles, on top of books... you can even put a row on top of a door jam! Using our pattern you can make whatever colors you like. All you need is the paper of your choice and two paperclips and glue.

Little black bird sits over the door in my bedroom which is done in black and silver.These sweet little birdies are perfect for a touch of whimsy DIY room decor and they can be placed in any room you like! Sit them on shelves, mantles, on top of books... you can even put a row on top of a door jam! Using our pattern you can make whatever colors you like. All you need is the paper of your choice and two paperclips and glue.

The little blue fellow sits on my peg board in my craft room.

And finally, Mr. Yellow Bird sits on a jar of beads on my sewing desk. These sweet little birdies are perfect for a touch of whimsy DIY room decor and they can be placed in any room you like! Sit them on shelves, mantles, on top of books... you can even put a row on top of a door jam! Using our pattern you can make whatever colors you like. All you need is the paper of your choice and two paperclips and glue.

Pinable Images

 These sweet little birdies are perfect for a touch of whimsy DIY room decor and they can be placed in any room you like! Sit them on shelves, mantles, on top of books... you can even put a row on top of a door jam! Using our pattern you can make whatever colors you like. All you need is the paper of your choice and two paperclips and glue. These sweet little birdies are perfect for a touch of whimsy DIY room decor and they can be placed in any room you like! Sit them on shelves, mantles, on top of books... you can even put a row on top of a door jam! Using our pattern you can make whatever colors you like. All you need is the paper of your choice and two paperclips and glue. These sweet little birdies are perfect for a touch of whimsy DIY room decor and they can be placed in any room you like! Sit them on shelves, mantles, on top of books... you can even put a row on top of a door jam! Using our pattern you can make whatever colors you like. All you need is the paper of your choice and two paperclips and glue. These sweet little birdies are perfect for a touch of whimsy DIY room decor and they can be placed in any room you like! Sit them on shelves, mantles, on top of books... you can even put a row on top of a door jam! Using our pattern you can make whatever colors you like. All you need is the paper of your choice and two paperclips and glue. These sweet little birdies are perfect for a touch of whimsy DIY room decor and they can be placed in any room you like! Sit them on shelves, mantles, on top of books... you can even put a row on top of a door jam! Using our pattern you can make whatever colors you like. All you need is the paper of your choice and two paperclips and glue. These sweet little birdies are perfect for a touch of whimsy DIY room decor and they can be placed in any room you like! Sit them on shelves, mantles, on top of books... you can even put a row on top of a door jam! Using our pattern you can make whatever colors you like. All you need is the paper of your choice and two paperclips and glue. These sweet little birdies are perfect for a touch of whimsy DIY room decor and they can be placed in any room you like! Sit them on shelves, mantles, on top of books... you can even put a row on top of a door jam! Using our pattern you can make whatever colors you like. All you need is the paper of your choice and two paperclips and glue. These sweet little birdies are perfect for a touch of whimsy DIY room decor and they can be placed in any room you like! Sit them on shelves, mantles, on top of books... you can even put a row on top of a door jam! Using our pattern you can make whatever colors you like. All you need is the paper of your choice and two paperclips and glue.


2 Comments

  1. These are so sweet. I made something similar recently based off a post from a different craft site, but I really like how you’ve shown where you’ve placed yours throughout the house. Mine are sitting on my desk, but now I have some great ideas of where they really belong.

    Reply

Leave a Comment

Your email address will not be published. Required fields are marked *

This site uses Akismet to reduce spam. Learn how your comment data is processed.