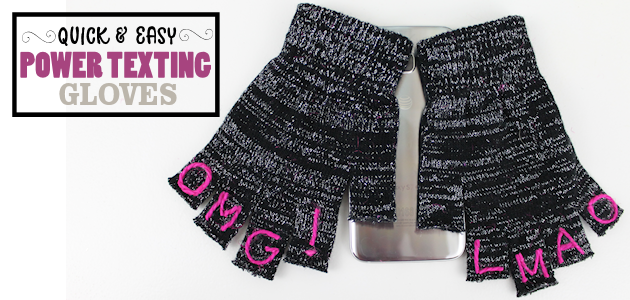
![]() Do you love to text? Are your hands cold? Do you get tired of taking your gloves on and off so you can text? Power Texting Gloves to the rescue! They’re inexpensive, simple to make and best of all you can add whatever power words you’d like and save all that time and money and pain on finger tattoos that your mom, husband, wife or whomever won’t let you get anyway. This is a win win DIY all around! You might want to sit down here because it just keeps getting better… guess where we got our gloves? That’s right… THE DOLLAR STORE! Oh my gosh… I know, I know… it’s almost too much to take in. And you get the free instructions below plus a list of words to pick from. Catch your breath from all this excitement, then grab you some gloves and get busy!
Do you love to text? Are your hands cold? Do you get tired of taking your gloves on and off so you can text? Power Texting Gloves to the rescue! They’re inexpensive, simple to make and best of all you can add whatever power words you’d like and save all that time and money and pain on finger tattoos that your mom, husband, wife or whomever won’t let you get anyway. This is a win win DIY all around! You might want to sit down here because it just keeps getting better… guess where we got our gloves? That’s right… THE DOLLAR STORE! Oh my gosh… I know, I know… it’s almost too much to take in. And you get the free instructions below plus a list of words to pick from. Catch your breath from all this excitement, then grab you some gloves and get busy!
Power Texting Gloves Supplies
- Tightly knit cheap gloves
- Fray Check
- Puff Paint (for paint words)
- Heavy String (for string words)
- Fabric Glue (for string words) Tacky Glue might work well as long as the gloves are not washed.
NOTE ON FABRIC GLUE: After a lot of research I use Beacons fabric glue because it has the highest reviews.
 Download Word Idea List
pdf of word list and direction image

 Instructions
NOTE: You do need to treat your gloves with care and don’t stretch out the finger holes anymore than necessary. The Frey Check helps a lot but they are still knit gloves and will pull apart if you are too rough with them. Just use a gentle “hand” so to speak.

These are the supplies needed for the Puffy Paint Power Texting Gloves. Gloves, Fray Check and Puffy Paint of choice.

These are the supplies you will need for the string text gloves. Gloves, Fray Check Fabric Glue and heavy String. 
Begin by cutting off the tips of the gloves where they start to curve.
Carefully put them on and see where they fall on your fingers. This lets you know if any need trimmed. You want to be extra careful at this stage to not stretch the ends out as they will fray easily at this point.
The pinky finger needed trimmed as you could see so I trimmed it a little. 
You then want to test them, again being careful to stretch them out as little as possible, to make sure they work fine for texting. Trim more if needed.
Once one glove is trimmed to the exact length needed, lay it over the other glove and trim it to match. 
Find a slim object you can stick your gloves over to hold them up while you put the Fray Check on the ends of each finger. I used two small spray cans.
Make sure each finger hole is spread out.
It’s now time to pull out the Fray Check which is perfect for things like this. 
You will run a bead of Fray Check around the edge of each finger hole. Don’t be afraid to rub it in as you go with the tip of the applicator. Put plenty on. If the end of any finger is curved under slightly make sure to pull it up so you can coat the area that has been cut. Fray Check dries quickly. Go over the ends again if needed to make sure you get a good coat around it. Do this on both gloves. 
Make sure the tips don’t touch each other and stay open so they don’t stick together from the Fray Check as it dries, which takes only minutes. 
For the puffy paint text I suggest practicing on paper first then apply your text to the four fingers. MAKE SURE TO DO IT THE RIGHT DIRECTION. Puffy paint normally takes about 4 hours to dry lying flat. 
For the string words, cut pieces of string for the words you choose.
You’ll want to make the words in sections as I did with the M. I laid all my words out ahead of time to make sure they were the correct size.
Once all your letters are cut, grab your fabric glue. 
Glue where the letters will be placed and attach them. 
![]()

![]()

![]()


