![]()
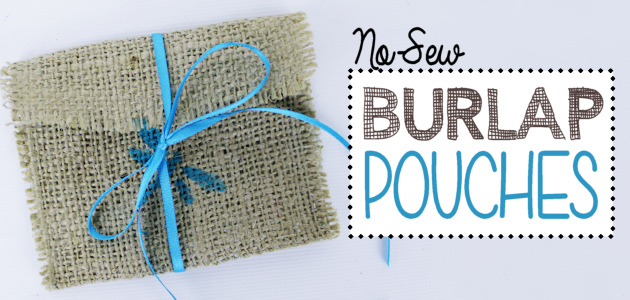
These no-sew pouches can be made in various sizes to hold all kinds of goodies such as dried herbs, crystals, notes etc. They make wonderful gifts for any age! We use them to hold our Gratitude Stones. They can be made in minutes and don’t require a single stitch! If you love burlap crafts, this one is a keeper!
![]()
![]()
Supplies for No Sew Pouches - A Burlap Crafts
- Burlap
- Pattern (free download below)
- Hot glue gun
- Extras: string, ribbon, buttons etc.
Download
NOTE: You can easily make your own any size you want but we've provided three patterns if desired.pdf
 [sdm_download id="20052" fancy="0"]
![]()
Instructions
These can be made in various sizes but we've included a pattern for the sizes shown. The key is to cut the burlap straight and along the lines. This makes it even when you pull the threads out to make the edges.
After cutting out your pattern, trim if needed on the burlap thread lines.
![]()
To make the even frayed edge pull ONE string at a time. It typically takes 1 to 3 threads pulled to make a nice edge depending on how long you want the frays to be. 
![]()
After you've pulled out the threads as desired you may notice they need trimmed a bit to even them up as shown below. 
![]()
Do this on all fours sides.
![]() Iron where shown on the pattern. (This one was ironed before fraying.)
Iron where shown on the pattern. (This one was ironed before fraying.)
![]()

![]()
Carefully glue the sides down. Don't use too much glue as it seeps through the burlap. Make sure you're on a protected surface.
![]() After gluing, press down on the sides using a craft stick or something similar so you don't burn your fingers if any glue comes through the fabric (which is usually does.)
After gluing, press down on the sides using a craft stick or something similar so you don't burn your fingers if any glue comes through the fabric (which is usually does.)

![]()
It's now time to decorate your pouches and add the ribbon or string for tying. There are various ways you can do this. The easiest is to take some ribbon or string and glue it in the center of the back. 
![]()
To close the pouch you can roll or wrap it, depending on how much you have inside it.
![]()
Pull the ribbon around and tie it. 
![]()
Another option is to feed some heavy string through two holes in the front or back. You can tie them or tack with glue. 
![]()
Roll or wrap. Use enough string that you can wrap it twice around, again depending on how much you have in your pouch.
![]()

![]()

![]()

![]()

![]()

![]()

![]()

![]()
Use the pouches to hold Gratitude Stones.


21 responses
Wow, awesome weblog structure! How long have you ever been blogging for? you made running a blog look easy. The overall glance of your website is fantastic, as neatly as the content!
Used your idea with my 8/9 yr old church group so important in this day to learn and practice gratitude. Thank you for sharing such a great idea. We all loved it.
How wonderful! Thanks so much for letting me know. What a great way to use it.
[…] If you’d like to give gratitude and thankfulness a boost in your home, gratitude stones are a wonderful incentive. They work for children and adults alike and both will love them! They are also wonderful for activities such as Thanksgiving Day dinner etc. And what a lovely positive gift when given inside our No-Sew Burlap Pouches. […]
[…] might also enjoy our Gratitude Stones and the Burlap Pouches that go with them. They make me think of […]
[…] Burlap Crafts No Sew Pouch by Our Peaceful Planet […]
I absolutely love this idea! These are so adorable and so quick and easy to make. I am sucker for burlap and will definitely have to make some of these 🙂 Thanks so much for linking these up to the Bewitchin’ Projects Block party this week. Hugs, Lisa
Thanks Lisa. Appreciate you stopping by and commenting. Glad you like them!
Picking up my supplies tomorrow and can hardly wait to start making the stones and pouches to give to all my friends at Christmas time.
That’s so cool! Always glad to hear we inspired someone. Ü Thanks for insisting Deanna!
How cute!! I just found a roll of burlap on sale at the store. This would be perfect for gift cards at Christmas-time! 🙂 Thanks for sharing at the #HomeMattersParty
You’re very welcome Jamie. So glad you found it useful!
love this idea, will have to make some for hanukkah! thanks for sharing on craft schooling Sunday!
You’re very welcome. Thank you for visiting!
No-sew and cuter than cute? Yes, please!!!
Who would’ve thought something so easy can be so cute. Thanks for sharing.
You’re very welcome. Thanks so much for stopping by!
These are just adorable. They make perfect cases for when giving small items as gifts.
Thank you Mary. They would definitely be great quick gifts!
These are cute and so simple to make. I like the stenciling and the ribbons. These would be a really cute way to give out gift cards.
That one was my favorite too. Ü Thanks so much for stopping by and commenting!