![]()
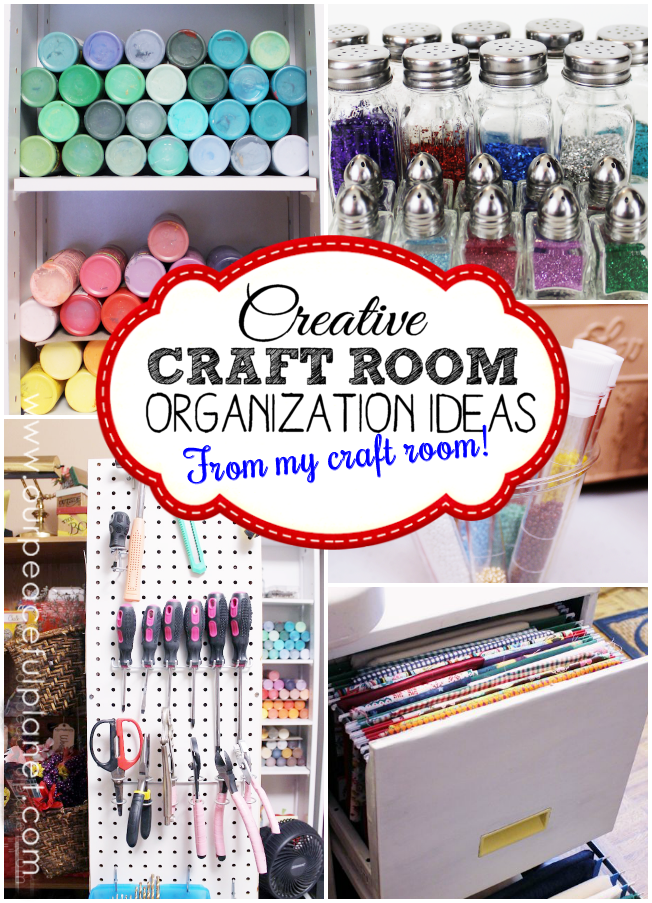
If you only have a small area for crafting we’ll show you how to make the most of it! My craft room is also my laundry room so I had to get super creative in order to fit as much as I could into the space and still have it be functional. I used mostly things I had on hand for organizing and decorating my room and to make it a fun place to create in. As you’ll see below, craft room organization doesn’t have to be expensive!
![]()
![]()
Floor Plan
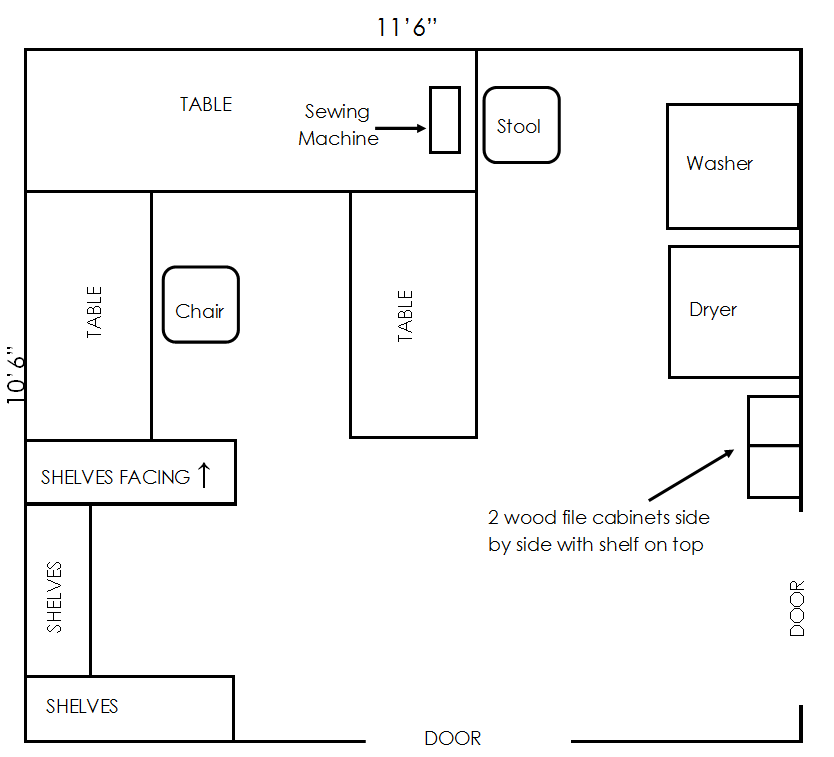
This is a rough sketch of my floor plan. The room is 11’6″x10’6″ and also holds my washer and dyer. You can get an idea of how I laid everything out in an effort to make the most of the space.  For a little help redoing your own rooms download our Free Room Makeover Kit.
![]()
![]()
A Few Supplies I Use for Craft Room Organization
If your budget allows it, here are some extra things that can make craft room organization much easier.
- Label maker
- Mini cabinets I have several sizes of these I had previously purchased on Amazon.
- Zip lock baggies. 4×6 2×3 I use these for everything and buy them in bulk on Amazon in all sizes very cheap.
- Small part organizers
- Plastic test tube type containers for my seed beads
![]() When we moved into our home I chose my laundry room to also be my crafting area. To make the most of the small room I used standing bookshelves and folding tables. I had originally placed everything in the room neatly but never really organized it well and it didn’t take long for the small space to become pretty messy and hard to find what I wanted.
When we moved into our home I chose my laundry room to also be my crafting area. To make the most of the small room I used standing bookshelves and folding tables. I had originally placed everything in the room neatly but never really organized it well and it didn’t take long for the small space to become pretty messy and hard to find what I wanted. 
![]()
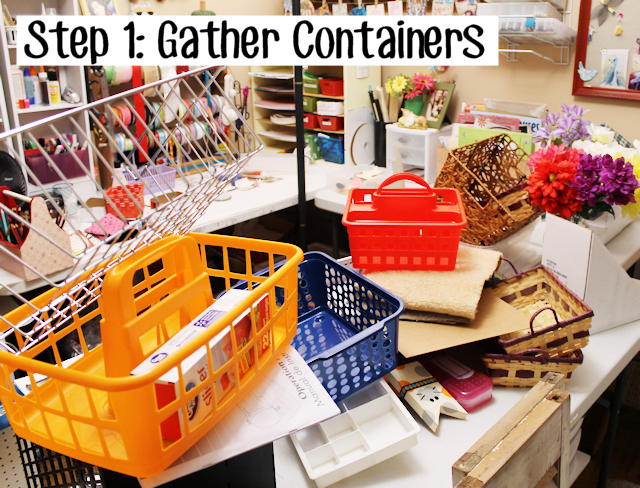
![]() My first step in getting it more organized was to hunt down all kinds of containers that I could use to help organize my stuff. The best place to get colorful containers of all sizes is your local Dollar Store. I already had quite a few containers already and I mainly used those.
My first step in getting it more organized was to hunt down all kinds of containers that I could use to help organize my stuff. The best place to get colorful containers of all sizes is your local Dollar Store. I already had quite a few containers already and I mainly used those. 
![]() This room is done in an eclectic style which I tend to favor. Bright colors and no set theme other than “fun and creative”. After gathering my containers I started going through all my supplies and weeding them out and organizing them much better.
This room is done in an eclectic style which I tend to favor. Bright colors and no set theme other than “fun and creative”. After gathering my containers I started going through all my supplies and weeding them out and organizing them much better.
Labeling
I can’t stress how important this part is. It doesn’t matter how many lovely containers you have holding your goodies, if you have to open each one up or pull it down to see what’s in it that’s just plain inconvenient. (Unless of course you’re using clear containers.) I labeled everything in my craft room that was in a container so that I could look at a glance and find what I wanted. For tiny containers and my small parts cabinet drawers I used my Brother PTD400AD Label Maker which I absolutely love. It prints in a variety of styles and sizes and on a different types of labels which are easily changed. It runs on batteries or an AC adapter. For larger containers I made my own labels by creating them in my favorite software then printing them on cardstock and attaching them to my containers in various ways. If you don’t have a label maker or a way to print your own do them by hand! They will look just as great and serve your purpose just as well. 
![]()
Organizing the Small Stuff
I not only organized the large items I had, I went through all my various tiny parts and pieces. I had thousands of buttons, some that were antiques my mom gave me and some that were newer sets I’d purchased for various crafts. I dumped them out and sorted them, picking out the nicer sets and placing those in tiny zip lock bags. I buy various sizes of these bags in bulk on Amazon. They’re very inexpensive for a large stack of them. I used 2″x3″ size for the buttons. I didn’t bag all of them, just the obvious ones, so I still have a large button box full of loose buttons. But when I need a nicer set for something I can now find it easily. 
![]()
![]() These tiny part cabinets are perfect for small items. I have three of them I’ve collected through the years. These had gotten fairly messy and mixed up and the drawers needed labeling. (I was tired of opening up every single drawer as I tried to find what I wanted!) I cleaned them out, sorted them and labeled them with my label maker placing the drawers in alphabetical order. Having lots of craft parts is pointless if you can’t find them when you want them. I’ve actually re-purchased things that I ended up finding later so organizing can save you money!
These tiny part cabinets are perfect for small items. I have three of them I’ve collected through the years. These had gotten fairly messy and mixed up and the drawers needed labeling. (I was tired of opening up every single drawer as I tried to find what I wanted!) I cleaned them out, sorted them and labeled them with my label maker placing the drawers in alphabetical order. Having lots of craft parts is pointless if you can’t find them when you want them. I’ve actually re-purchased things that I ended up finding later so organizing can save you money!
![]()
![]() My jewelry parts were already in small plastic boxes with sections but they had gotten out of control and mixed up so I sorted through those also.
My jewelry parts were already in small plastic boxes with sections but they had gotten out of control and mixed up so I sorted through those also.
![]()
![]() I had a lot of tiny seed beads and wanted a better way to store them. I found these plastic test tube containers with lids that worked great! I filled them by standing them in a cup of flat marbles and then using a funnel made from the corner of an envelope.
I had a lot of tiny seed beads and wanted a better way to store them. I found these plastic test tube containers with lids that worked great! I filled them by standing them in a cup of flat marbles and then using a funnel made from the corner of an envelope. 
![]() I had an old antique flower planter and decided it would be perfect to sit on my table and hold my files and other paper items.
I had an old antique flower planter and decided it would be perfect to sit on my table and hold my files and other paper items. 
![]()
![]() I use wrapping paper for a variety of crafts including using it as wall paper on occasion! I utilized the back of one of my shelves to hold these rolls using some elastic.
I use wrapping paper for a variety of crafts including using it as wall paper on occasion! I utilized the back of one of my shelves to hold these rolls using some elastic. 
![]()
![]() I had two small skinny shelves and decided to set those on my craft table to hold my small paint bottles, among other things. I placed the paint bottles on their sides, making sure the lids were on tight, and grouped them by color. I can now grab the color I want at a glance. For my small material pieces I used an old filing cabinet and hanging file folders. I previously did a full tutorial on how to organize fabric with a file cabinet.
I had two small skinny shelves and decided to set those on my craft table to hold my small paint bottles, among other things. I placed the paint bottles on their sides, making sure the lids were on tight, and grouped them by color. I can now grab the color I want at a glance. For my small material pieces I used an old filing cabinet and hanging file folders. I previously did a full tutorial on how to organize fabric with a file cabinet.
![]()
![]() I came across a magnetic strip in my storage that for meant for holding kitchen knives. It was perfect for attaching to the side of one of my shelves sitting on my desk. I stick my scissors on it.
I came across a magnetic strip in my storage that for meant for holding kitchen knives. It was perfect for attaching to the side of one of my shelves sitting on my desk. I stick my scissors on it. 
![]()
![]() I also found an old wire kitchen lid rack in storage. I hung it sideways on the wall and my bead and jewelry containers fit nicely into it. Notice the label above it that I printed.
I also found an old wire kitchen lid rack in storage. I hung it sideways on the wall and my bead and jewelry containers fit nicely into it. Notice the label above it that I printed. 
![]() I had a bunch of Washi Tape that was just stuffed into a container. I decided to make a dispenser to display it nicely using a cardboard box. Check out the Washi Tapes Dispenser tutorial!
I had a bunch of Washi Tape that was just stuffed into a container. I decided to make a dispenser to display it nicely using a cardboard box. Check out the Washi Tapes Dispenser tutorial! 
![]()
![]()
My Supply Nook
I used three cheap standing bookshelves to hold the bulk of my supplies. I arranged them in such a way that they made a nook with one of the shelves facing my work area. Below are the various ways I organized my supplies.


 Working Area & Pegboard
Three folding tables are arranged for my work areas. You'll also notice I had fun decorating in various ways. My dad does woodworking and made me the items shown to hold my ribbon and paper. The chair you see was an old ugly folding chair that I gave a makeover on this post. You'll also notice that I've made use of all the space under my tables to store things I don't get into very often.

![]()
This is my main working area. 
![]()
![]()
I have one bookshelf turned outward so I have access to those shelves while I'm working.

![]()
![]()
I'm especially proud of my pegboard you see on the end of the one set of shelves. It was so easy to do and we did a full post on how to hang pegboard anywhere.
![]()
I had a large old frame that I made into an inspiration board to hang in my craft room. The link will take you to that post if you'd like to make your own! It also has custom thumbtacks I show you how to make.
![]()

![]()
![]()
My sewing machine was placed on the far end of one of my tables. The washer and dryer on directly behind it. I had a small stool that was a good fit for that spot and that is what I sit on to sew. I keep my sewing supplies under the table on the left. 
![]()
![]()


25 responses
Merci pour tes idées.
Je vais construire mon coin bricolage semblable au tiens,
Where did you find the table top shelf space that you used for you paints? I love it and should use that idea I have so many.
Hi Vivian!
I tried to find where I got those but I’ve had them for so long I can’t remember and couldn’t find them doing some searching. I believe they are media towers… as in for DVDs or CDs. I don’t have the size as they are currently in storage. I didn’t pay a lot for them but I can’t find anything less than about $35 such as this one on Amazon: https://amzn.to/2uJOzpF Again, you’d need to look at the size and make sure it would work. I typically get this type of thing from either Walmart or Amazon. You can search for Media Storage or Tower Storage to try and find something that might work.
Thanks for visiting and I’m glad you enjoyed the post!
Nancy Ü
I love the idea to put the washi tape in a box..that really looks nice, I want to do that for my ribbon also, thank you for the idea/ info
You’re very welcome Mary.
Ameis suas idéias! me inspirou na organização das minhas folhas de E.V.A.
Ju, muito obrigado! Fico feliz que você ache útil.
I love this! I will definitely be trying this out soon! Thanks Nancy!
You’re so welcome Anna. Have fun!
[…] Most creative Craft Room Organization Ideas from Our Peaceful Planet […]
Hello,
I have a solution for some of your guests who have a lot of 2 oz. acrylic paint bottles and acrylic squeeze tubes. I wonder what you may contribute, as far as a review, on my new product which I plan to offer through an IndieGoGo fundraising campaign this month (Jan. 2017).
The following link is my solution for my large number of paint brands (and craft tools). Thanks for your input, if possible, and happy painting. >>>>> https://www.youtube.com/watch?v=QWOFXWeJ44M
Philippe Plouchart
4916 9th Avenue
Sacramento, CA 95820
This was a very informative site! I too have laundry in same space as crafts and sewing which is a challenge in my 12×13 room. Thank you for your inspiration, I am going to get this room done!
[…] Most creative Craft Room Organization Ideas from Our Peaceful Planet […]
Awesome & inexpensive ideas!!!…very inspirational for an “aspiring crafter”
Thank you Sekena. Ü
Ahh! So many clever, clever ideas here! I love organizing too, I pinned this to my organizing board, very inspiring and this post gets me motivated to organized my office supply/craft storage closet! Thank you for sharing!
Thanks Sara. Appreciate your visiting and leaving such a kind comment. Ü
Looks great! I love how you organized everything. Really great ideas. Thank you for sharing, and thank you for linking up at the #HomeMattersParty this week. Hope to see you again next week.
Thanks Shann Eva. Appreciate the comment!
Great organizing! Some great ideas. I’ve wanted to do a peg board since I first saw one in a magazine. Some brilliant ideas here. I’m definitely want to check out you washi tape holder, think I’d like to make one, since my collection seems to be growing 😉
Over from Homematters linky.
Thanks so much Kate. Appreciate you stopping by and commenting. Ü
I love the idea for the wrapping paper. I think I will give it a shot.
Very inspiring. I’ll be pinning it.
#homematters
Thanks Debbie! Good luck!
Great ideas and layout, I hope to organize mine this winter.
Thanks Lynn. Ü