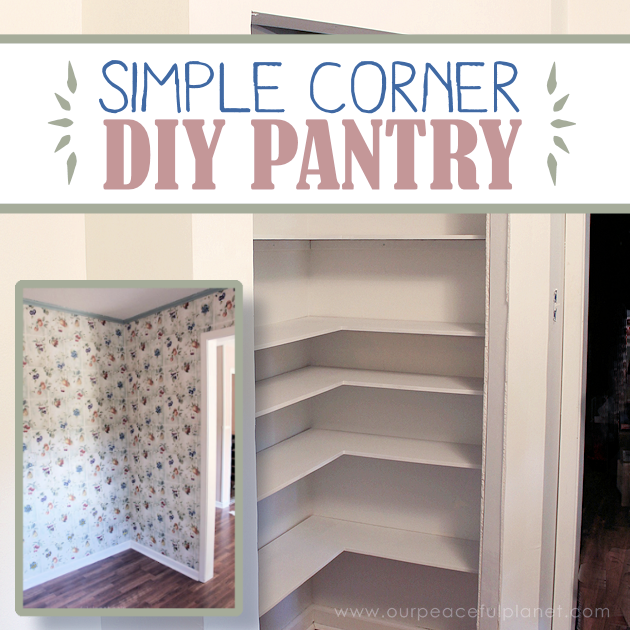
![]() I’m kind of embarrassed to admit this but we were using a stand up clothes armoire as a simple DIY pantry in our kitchen because we didn’t have enough space to hold all our food stuffs. Hey, you do what you need to do. And I needed more space for my canned goods. Roy, who’s not a carpenter, finally decided he was going to make us a pantry as part of our outdated kitchen transformation.
I’m kind of embarrassed to admit this but we were using a stand up clothes armoire as a simple DIY pantry in our kitchen because we didn’t have enough space to hold all our food stuffs. Hey, you do what you need to do. And I needed more space for my canned goods. Roy, who’s not a carpenter, finally decided he was going to make us a pantry as part of our outdated kitchen transformation.
It would be small and in the corner, but it would be floor to ceiling. So he designed it using Googles free program SketchUp. Then he bought the materials and started building! I’m amazed at how much this small pantry holds. I was able to empty the “armoire” pantry and a couple of cupboards. You can watch him make it start to finish below. If you enjoy these do it yourself wood projects, you might also like our DIY Bed Canopy.
Supplies
I had not added these when the post was originally created so I asked Roy to try and recall the cost. Here is what he used and the cost to the best of his memory.
- 12 2″x4″ : $36
- 3 pieces of wallboard. $30
- Door: $32
- Drywall Compound, Spreader and Sandpaper (we had these) 12 lbs of compound runs $12 on Amazon.
- Paint, White (we had this also)
- You would most likely need trim which varies in cost.
SHELVES
- 6 each 1”x2”x8’ boards (shelf supports) Approx. $1.32 each ($7.92)
- 2 each 1/2”x4’x8’ (shelves) Approx. $12 each ($24)
TOTAL COST $98 (not including the things we had already)
 Simple DIY Pantry Plans
We’ve had so many people ask about sizes and plans that we’ve added a download that has that information. Or the best we can give anyway. Roy used the free software Google Sketchup to draw up the plans to fit our space. We’ve included the pictures which show all the dimensions and the actual Google Sketch up file itself should you want to grab the program and pull it in.
Plans pdf

Google Sketchup File (zip format)

![]()
Pantry Sign Printable
I’d had some requests for the Pantry sign which I cut out of vinyl using my Silhouette Portrait machine. I created a printable if anyone was interested in a similar sign with colors. It can be printed and laminated if desired.
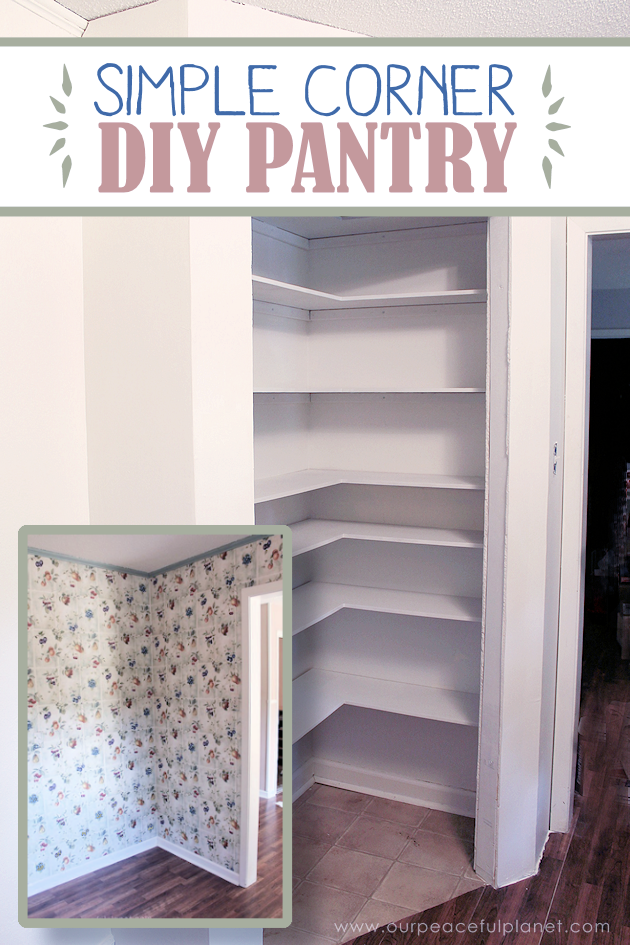
This is the corner it was going in to. Not very big is it? (FYI it has been painted)
This is what we were using for a pantry along with a couple of the kitchen cupboards.
Roy LOVES messing around Google SketchUp and he designed the new pantry.
The start of the framing now begins!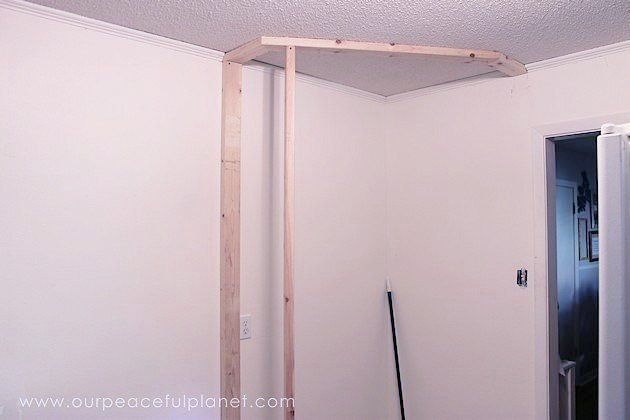
![]()
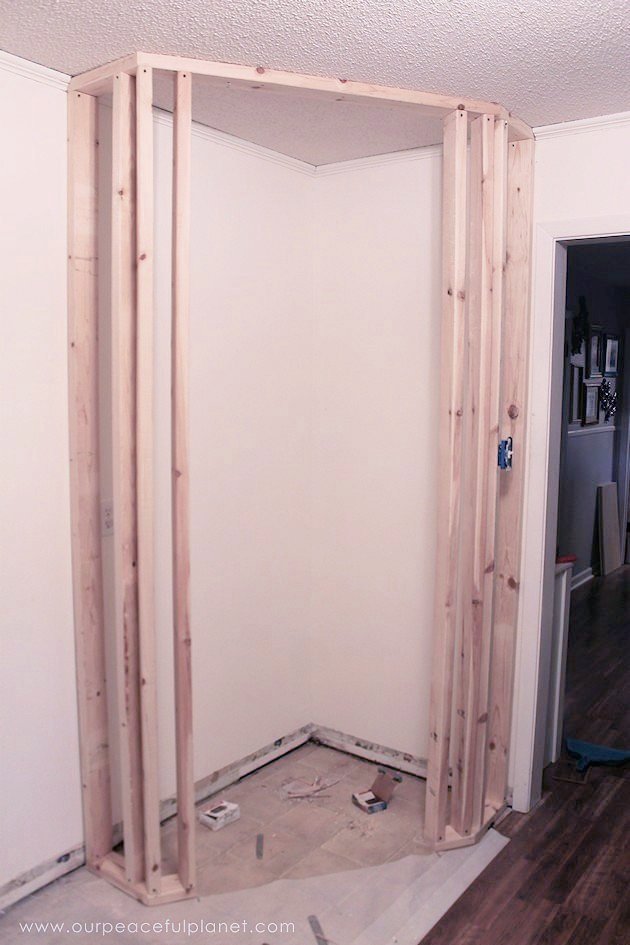
![]()
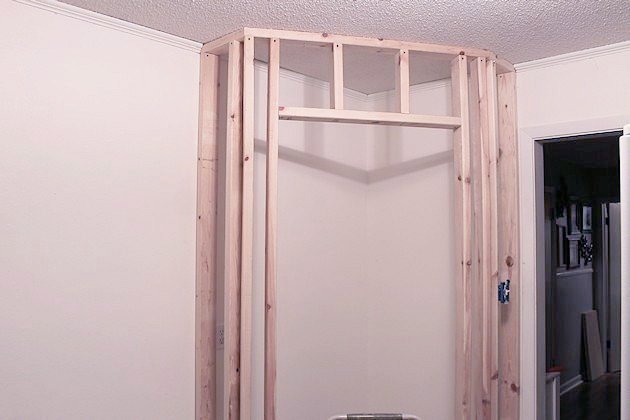
The outlet was on the wall which would now be “inside’ the pantry so Roy had to move it. Fairly easy job. 
After the frame was up, the sheet rock was cut and put up. 
Then wood strips were added for the shelves. We purchased six 1″x 2″s and cut them to lengths for holding our shelves.
The sheet rock was mudded and sanded by our son Adam. 
Roy began painting the inside. 
After carefully measuring the dimensions, shelves were cut out of 1/2” MDF board. These shelves will eventually lay down on top of the supports we previously installed.

More sanding by Adam. 
Shelves inserted and painted. The final step. The door!
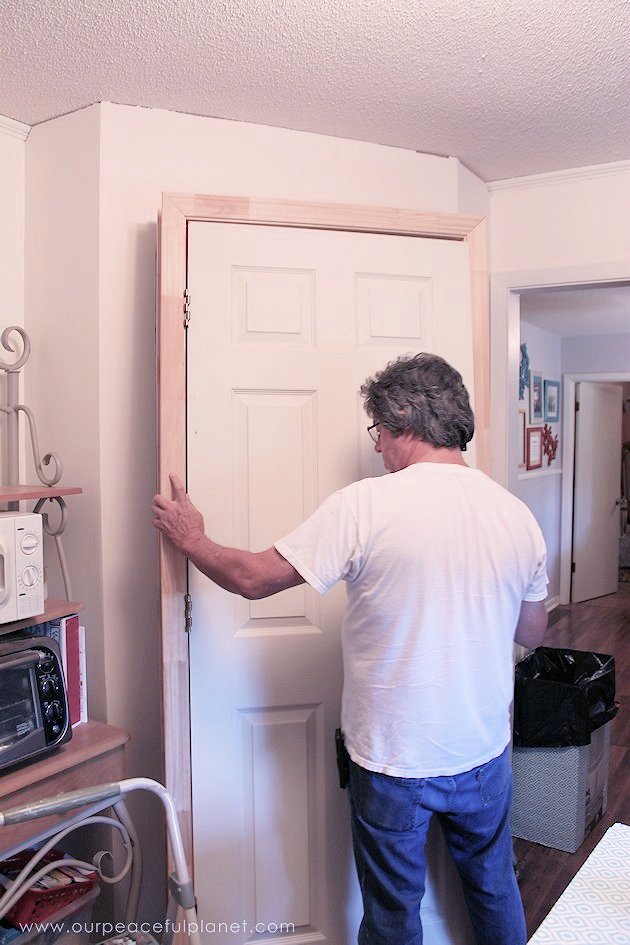
The door and frame were painted.
![]()

Though this will be part of the decorating post you get a sneak peek. We added a label to the door.
Perfect! You’ll see more later!
Actually there was one more step. Roy added some shelving on the side so we could get rid of a bakers rack that held a variety of appliances. Now came the fun part. Filling the new pantry!


I can’t believe how much stuff we could fit into that small pantry. We opened up so much cupboard space in addition to getting rid of the old armoire. 
I purchased a special container on wheels for Oliver’s dog food. We can now store paper towels inside rather than in the garage. 
Items that are not used as much go on the upper shelf. 
I don’t get all fancy with my organizing in here as there is such a turnaround. I just keep it neat. 
![]()

![]()
![]()
it!



48 responses
I found your “happy” at my unhappy moment! I was trying to figure out how to do a pantry and this is perfect!!
I’m sending this to all my friends and family!
Thank you
Wondering what they angles were for the cuts on the 2x4s
Hey Todd! I asked my husband and he does not remember the exact angle. They were cut to fit our specific space though. Sorry I don’t have the specifics on that.
This is the best thing I’ve seen that I think would fit bit I’d need the wall measurements for sure! Even just the floor measurements would give me. Enough information. Thanks!
What was the corner wall measurements, on the sketch it shows one wall 3’ 4 1/2” but I can’t tell what the measurement is for the back wall, I’m trying to figure out if we can build one like this one , Thanks
What is your actual dimensions of the pantry? I am wanting to put a pantry in our kitchen but have a small area to work in. Like the width of each wall and then the size door you installed.
This is the most comprehensive project I have found. And you guys make it look so easy. How tall is your ceiling? I’m curious. It looks beautiful and how are the shelves holding on? My husband is afraid they’ll tilt forward after a while
Hi Estela!
The ceiling is a standard 8 foot ceiling. As far as the shelves, if you look a few photos down you will see firring strips my husband placed. Because the area was smaller those held the shelves really well. We had canned goods etc and have not had a sagging problem. If it was larger we would have added extra bracing but this worked great. Ours have been in place about 4 years and no sagging or tilting whatsoever. But again, the depth of the shelves and the width of the area would determine if we needed more bracing. But they held up wonderfully. Ü
So glad you liked it. Always happy to inspire!
Good luck!
Nancy
Hi Nancy! This looks great and something we need for our new place. Do you know if this is something that we could take down when we move? Our place is a rental…
Hi Liz!
Well you can technically take anything down and then patch and paint the walls. Ü but as we built this in it would be a lot of work. I’m sure there’s a way to make it more portable but I don’t know the details on how you would do that. We lived in rentals for many many years and I have several posts about how I adapted space but I never did a pantry for a rental. Hope you come up with something that works!
Here are a few of my posts that I did when we lived in rentals. Maybe they will spark some ideas.
https://craftyourhappiness.com/2014/04/08/treadmill-nook/
https://craftyourhappiness.com/2015/05/14/make-a-library-nook-in-a-small-home-organize-it/
https://craftyourhappiness.com/2014/05/28/craft-room-rental-home-style/
https://craftyourhappiness.com/2017/06/29/easy-room-divider-for-a-gorgeous-global-library-laundry-room-combo/
(the last wasn’t a rental but it would still work great for that!)
I live in an apartment i want the pantry in my room the wall measures 10×1 1/2 the window is 6× 1/2 but not all the way to the top i hope you see this comment i need some advise, thank you
Hi Teresa! Unfortunately every place is different. We just kind of figured ours out by deciding what we wanted then measuring. A window might complicate things depending on location. Sorry I can’t be of more help. Good luck!
Nancy
Hi
Where did you get the label for the door? Can I get different colors/
Thanks
Hi Sue! I made the label using my Silhouette Portrait vinyl cutting machine: https://amzn.to/2FKXEQw The font is Style Script Pro. The colors are from the vinyl I cut but are close to these: #008eba #b94b7c #8d8d55
Love this project and this is exactly what I need to get some handyman quotes, thank you! Can you tell me roughly how long this took to build?
Hi Amber… sorry for the delay. We moved and I was unavailable for a while. It took us about a week I think. All depends on how much time you spend on it each day. Ü
Hi. I’m make a similar pantry as you did. Can you tell me if your shelves sag since you only have the rear supports? Thanks
Hi Chuckie!
Nope… no sagging. Our shelves were not long enough to be concerned about that. However for longer shelves you would definitely want bracers. Good luck!
This is so cool. Similarly, I want to add a pantry but have tiled floors and feel stuck on how I could attach the frame without breaking the tiles. How did you anchor the frame to your floors, if they are tiles?
Hi Dee!
We did not nail the studs into the floor because the framework was nailed to the wall and rafter studs which held it very secure. The bottom studs did not need to be nailed in.
Good luck!
Nancy Ü
how wide are your shelves once they are cut?
I’m unsure exactly… the details should be in the google sketchup file though that you can download!
Love this idea! What did you use for the shelves, please? I didn’t see it listed. Thank you.
Hi Linda! I’m still waiting for the details list of those… I didn’t realize I forgot that! But my husband said “1/2 inch MDF board that sits in thin 1×2 ledger boards”. He’s supposed to get me specifics which I’ll let you know once I get them. Thanks so much!
Hi Linda, I’ve updated the post with the following info:
6 each 1”x2”x8’ boards (shelf supports) Approx. $1.32 each ($7.92)
2 each 1/2”x4’x8’ (shelves) Approx. $12 each ($24)
When you scroll down to the pics that show the 1×2 strips for the shelves, I would say something like… we purchased six 1×2’s and cut them to lengths for holding our shelves. Further down the page where it shows the pic that says that…
Shelves were cut… I’d just expand on it to say something like… After carefully measuring the dimensions, shelves were cut out of 1/2” MDF board. These shelves will eventually lay down on top of the supports we previously installed.
This is a genius idea! I’m so impressed – and it even has a real door!
Many years ago we had a carpenter carve a tiny mudroom out of a little garage space. It made such a difference to not have a pile of shoes and backpacks on the kitchen floor. Now after reading your post, I’m looking around my house and looking at ‘dead space’ corners to see what I could do with them :).
Thanks Jeanne. Glad you found it inspiring!
So I don’t see anything about what the final cost of this project was.
We should have kept track of that. I’ll see if my husband can give a close estimate and get back to you.
Here is the best estimate my husband could recall. I’ll put this on the post also:
12 2″x4″ : $36
3 pieces of wallboard. $30
Door: $32
Drywall Compound, Spreader and Sandpaper (we had these) 12 lbs of compound runs $12 on Amazon. http://amzn.to/2Bj7Jo6
Paint, White (we had this also)
You would most likely need trim which varies in cost.
TOTAL COST $98 (not counting the things we had already)
Awesome idea,came out nice!
Thanks!
I don’t know if you will see this comment, but thank you all the way from Scotland!
I have been saving ideas for a pantry and lately the ideas have been closer to my dream, I even had a chap came to fix a tap and he said, “I could build you a pantry”!
Hubby is delighted, DIY man he isn’t, although we both used to enjoy “Home Improvemnts” lol!
Thank you so much ♡
Hi Shelagh! I see everyone one of my comments and reply if needed. Even from Scotland. Ü I LOVE hearing from readers. Thank you so much for the kind comment. And your very welcome. Ü
Do you have the plans available?
I’m afraid not Teri. We just did it to fit our specific space. My husband’s no carpenter he just winged it. Ü
Can you please tell the size of the wall space that was used on both sides to create this amazing project.
Thanks
You bet Darla. I had someone else ask that. The pantry size is 3′ from the corner on the right side looking at it as that’s as far as we could go due to the walkway opening. Then it’s 4 feet on the left side looking at it. That was just a size we determined so we could have room for the shelves we wanted and still have enough space to open the fridge…. not make it too crowded.
Thank you so much,my son bought me my what will be forever home and I am remodeling it myself. The kitchen is a blank slate and I knew I wanted a pantry but I could not figure out how to add it in with everything else in the space I have. I have a exterior door on one wall with a corner very close to yours and it had me stumped. Thank you so much for posting this, it’s perfect.
Love the comet cabinet its great how can I get the plans I have a very very small kitchen and dinning room thus is wonderful thanks for posting
Thanks Sharon! So glad you enjoyed it!
[…] and Affordable Pantry Door Organ… Darling Dollar Store Plastic Plate Kitchen Wall De… Add Space & Convenience with a Simple DIY Pan… .yuzo_related_post img{width:204px !important; height:96px !important;} .yuzo_related_post […]
[…] Add Space & Convenience with a Simple DIY Pantry […]
Super project. Thanks kindly for sharing your process.
[…] Add Space & Convenience with a Simple DIY Pantry […]
I love your pantry & the directions were so clear & concise. Job very well done.
What a GREAT job! Nice to have a husband and son who are so very handy! By the way, I love their hair :-)!
Thank you Bobbie! (I’m kinda attached to the hair too Ü )