
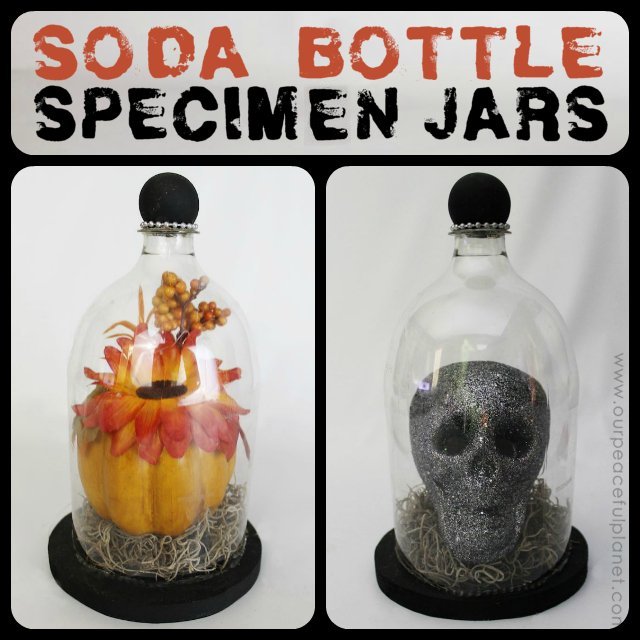
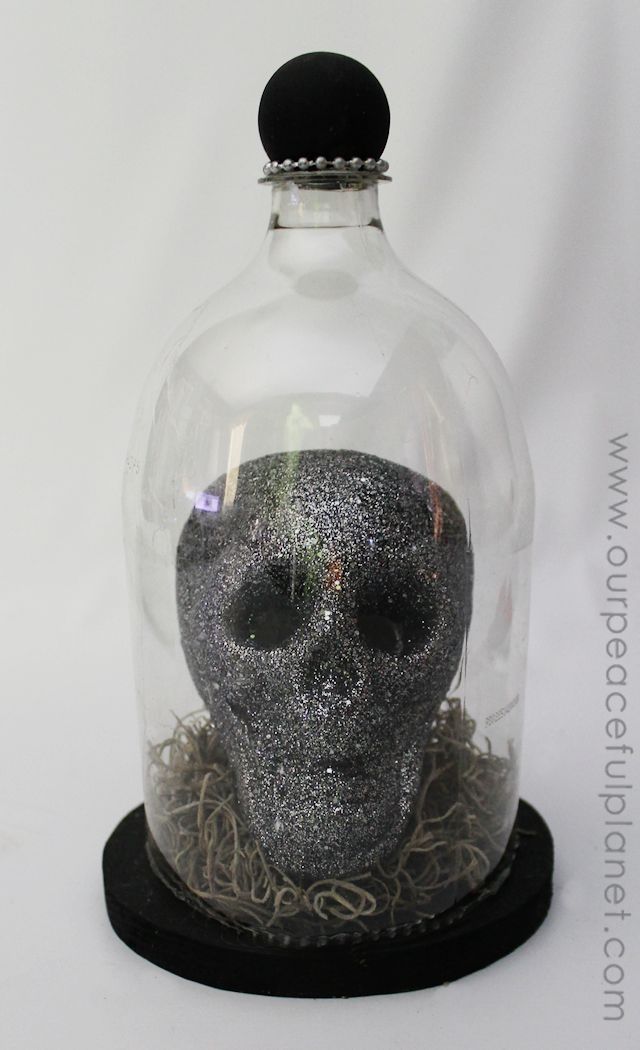
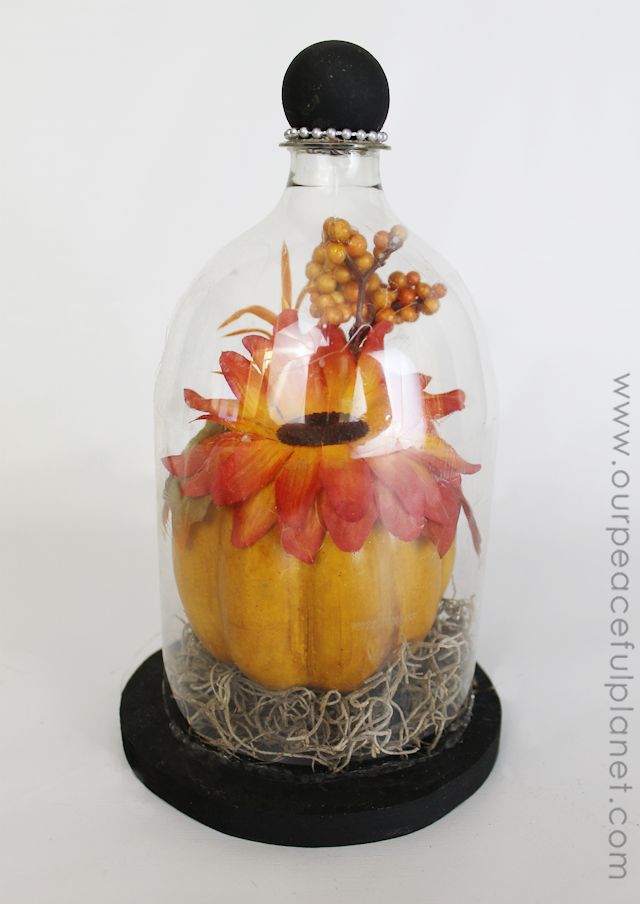
Remember our fun cloches from soda bottles tutorial? Well they also work wonderfully as specimen jars for your spooky Halloween decor. I hit up the local Dollar Store which has an endless supply of ghoulish things to stick in them. I chose a skull on the spooky end and a pumpkin for those who enjoy the lighter side of Halloween.
The same basic instructions are followed to make the specimen jar. It’s basically a 2 liter plastic soda bottle on a wood base. It’s so easy and looks so awesome. You could whip up a bunch of these in different heights and display all kinds of creepy things in them.
This is a short and sweet version of the jar using a black wood ball on top. If you want a detailed version with more varieties view our original post here.
![]()
![]()
Specimen Jar Halloween Decor Supplies
- 2 Liter Bottle
- Hot Glue Gun
- X-acto type knife
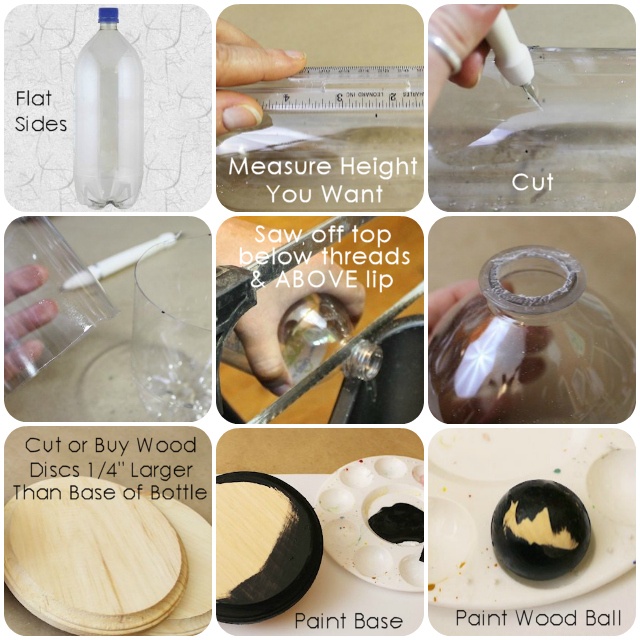
- Wood Base: Aprox. 5.5″ (Good idea to measure. You want the base just a tiny bit larger than the bottle.)
- Wood Ball: 1 1/4″ (aprox)
- Moss etc. if desired.
- Fine tooth hand saw to cut off threads of bottle.
Assembly Instructions
- Remove the label from your plastic bottle. I use Goo Gone. Works great!
- Measure your bottle so it’s the height you want for your item.
- Using an X-Acto knife cut the bottom off the bottle carefully and as straight as possible.
- Using an appropriate fine saw cut off the threads on the top of the bottle ABOVE the lip part that sticks out at the base of the threads.
- Paint the wood base. Paint the round wood ball.
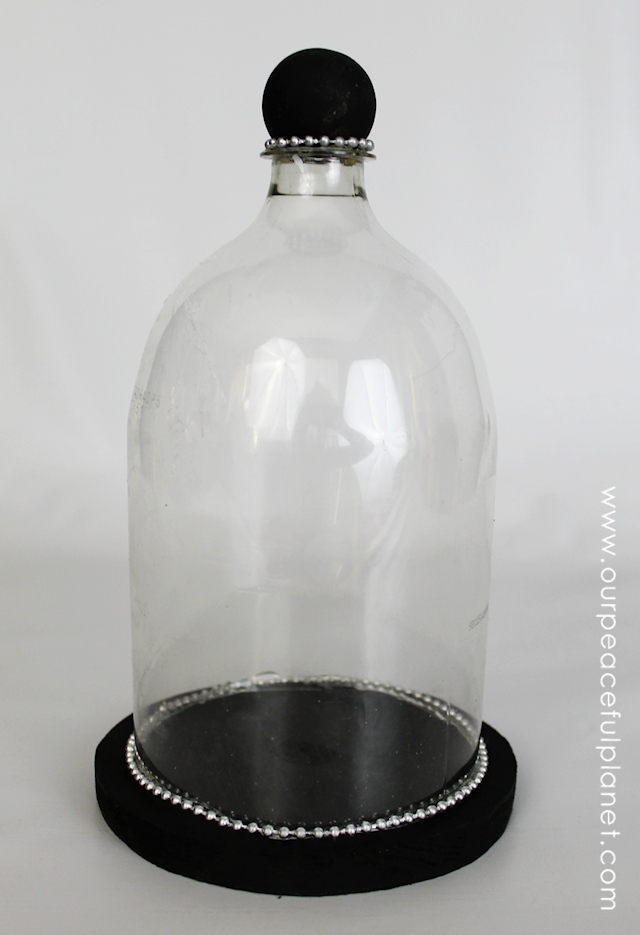
- Put a fine line of hot glue on the top of the bottle for holding the ball in place.
- Add moss around the base if desired for sitting your item on top of.
- Insert your display item. I place a dab of glue at the base on the back to hold the bottle in place.
![]()
Photo Instruction
- Measure and cut your bottle so it will be the size to fit whatever you will put in it.
- Saw off the top below the threads but ABOVE the ring that sticks out. (This is very hard plastic.)
- Paint a wood disk that’s about 1/4″ larger than base of bottle. Crafts stores carry these or cut one yourself.
- Paint your base and ball.
![]()
![]()
Hot glue around the top ring of bottle and add your ball. Optional: I added a silver spray painted pearl string around the bottom and base of ball. Glue some moss if desired on bottom wood to set your item on. Cover with you bottle.
![]()
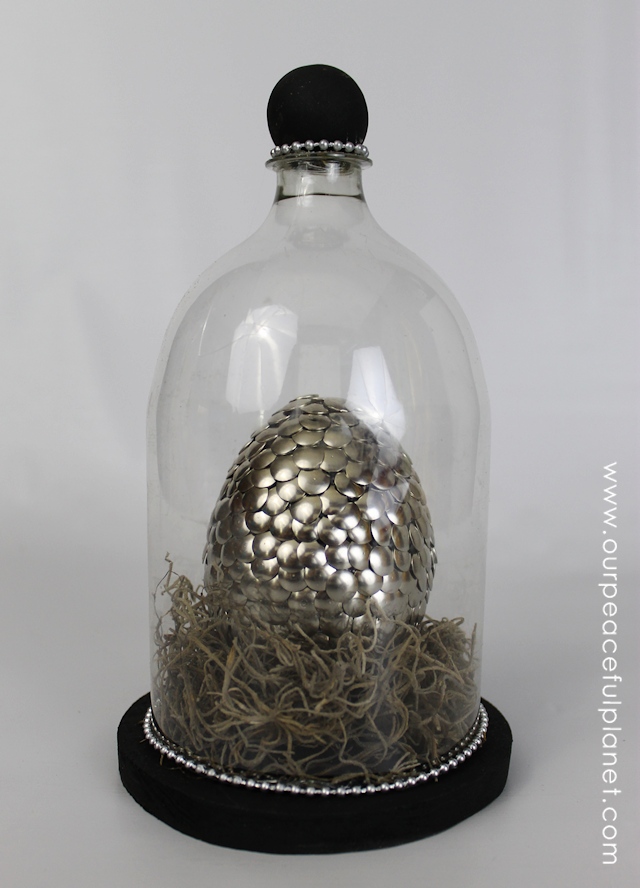
Finished Specimen Jars
![]()
![]()
Here’s what I use mine for! Dragon Eggs! (Tutorial Here and Here)
![]()
Love all your crafty /artsy creations! 🙂
Thanks Diana!